
Can you turn a Raspberry pi into Jarvis (Link), well can you interact with a pi using voice commands? As with all projects started down a path and ended up with something else, discovered there was any easier solution, anyway ...
The easiest part is text-to-speak. There are a quite a few different command line tools and python libraries available, for no good reason i went for 'espeak'. To allow the pi to play pre-recorded sounds, or general sound effects (.wav files), i also installed 'aplay'. To install these software packages (i think :
sudo apt-get update
sudo apt-get install python-dev
sudo apt-get install alsa-utils espeak python-espeak
As my monitor uses a DVI input i.e. it doesn't support sound through the HDMI cable, need to use the 3.5mm audio out socket. By default the pi should auto-detect which output to use, but i found this didn't always work. Therefore, to configure the pi to use a specific audio output rather than the HDMI use the following command:
sudo amixer cset numid=3 1
The final digit indicates the output: 0=auto, 1=3.5mm and 2=HDMI. By default the sound level form the 3.5mm jack is quite low, i'm guessing its intended for headphones, therefore, a little on the quiet side for speakers. To increase the volume use the following command:
sudo amixer sset PCM,0 100%
The final number is the volume, may of misread the range but it seems to be 0 to 200%? The pi is now ready to speak. The 'espeak' command is easy to use, to say "hello" simply type:
espeak hello
To change the voice/language or change between a male/female voice you can '-v' option, to adjust the speed i.e. number of characters per second you can use the '-s' option, to adjust the volume use the '-a' option. A couple of examples are given below:
espeak -ven+m1 -s 100 -a 50 "hello world"
espeak -ven+f1 -s 200 -a 100 "hello world"
The first line uses male voice 1, talking slowly and quietly. The second line is a female voice talking loudly and quickly. There are four 'different' voices: m1-4 and f1-4. Haven't explored the functionality of espeak, but it does recognise ',' which adds a pause to the output. In general i thought the speed was a little fast, so tended to use '-s 120', also found that there wasn't a lot of difference between the voices, small variations, the quality of the voice i.e. understandability, very much depended on the text. To play a .wav file i.e. a sound effect, i used 'aplay', simply type at the command line:
aplay police_s.wav
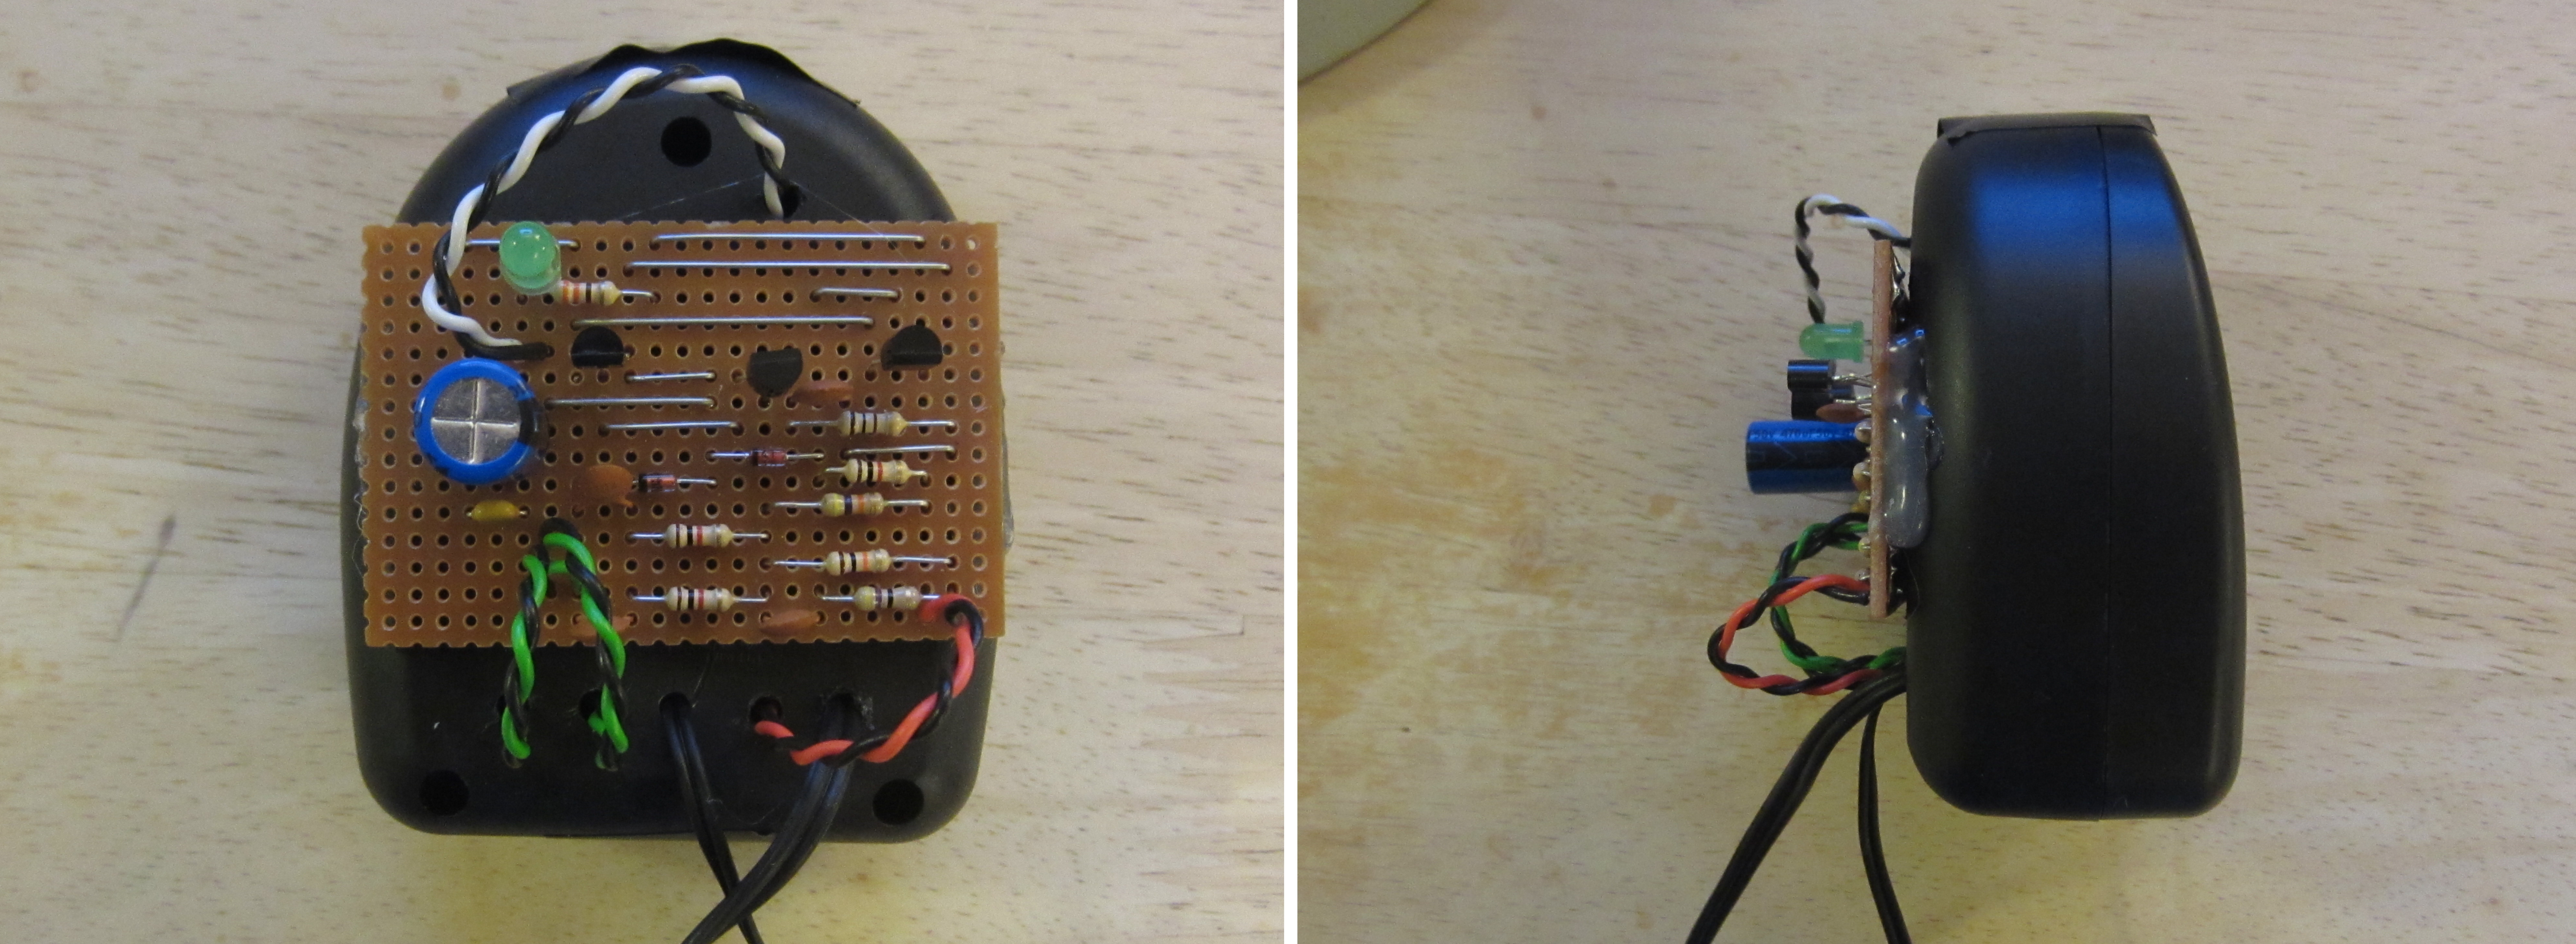
There are quite a few web pages with free sound effects. The police siren was obtained from (Link), found this on (Link). Now just need speakers so that we can hear the sounds. Keeping this cheap and cheerful went to my favourite pound shop and purchased a pair of 'mp3' speakers, as shown in figure 1. These where ok, but as suspected a little on the quite side i.e. the audio out of the pi isn't designed to drive large amounts of power, also the speakers are a little on the small side. Therefore, to up the volume a little needed to build a small power amplifier.
Figure 1 : Speakers
Before considering what type of amplifier is needed, need to know what the output signal from the raspberry pi looks like. Figure 2 shows the voltage output on one channel for a sound effect and text-to-speak. Peak amplitude is around 600mV, or 1.2V peak-to-peak. Therefore, going to need a little voltage amplification as well as an output driver stage. To avoid having another power supply going to use the +5V from the Raspberry pi, therefore, going to need a little voltage amplification, and a low impedance output stage to drive the speaker.
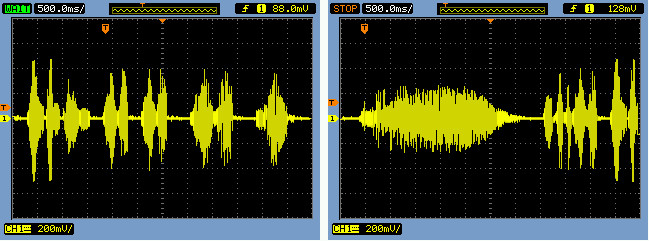
Figure 2 : Output signal, speech (left), sound effect (right)
There are a lot of different ways of designing an amplifier, do confess not really my area of knowledge, therefore, the amplifier chosen is straight out of the text books, a classic class AB amplifier. I'm sure it can be improved, but, it does seem to work. Well the first one worked ok, then i made another and it seemed to self destruct, need to look into that, you have been warned, work in progress :). The audio output from the pi is i assume a stereo signal i.e. separate left and right channels. However, for this application we are not looking for sound quality, surround sound etc, just a clear, 'loud' sound. Also, for stereo you would need two power amplifiers (one for each channel), doubling costs. Therefore, a 'mixer' is used to combine the two stereo signals together to produce a single mono signal.
Before trying to build this amplifier always nice to simulate the circuit before construction. I used LTSpice (Link), fast, free and easy to use. Normally i like to use a textual description i.e. your traditional SPICE model, as it tends to be faster. However, i haven't used this simulation language for a little while and i always forget how to specify diode/transistor parameters, so cheated and used LTSpice's schematic capture front end. An unexpected advantage of this was that the diode and transistor models were already available in the standard library, so no tweaks required. The LTSpice circuit diagram is shown in figure 3, the design file can be downloaded here(Link). An useful feature in LTSpice is that you can convert the schematic into a SPICE simulation model, as shown in figure 4. Using this model you can then prototype/test the circuit, as shown in figure 5. The middle trace is the 'input' signal, the top trace is the collector voltage of Q1, and the bottom trace the voltage across the load (speaker).
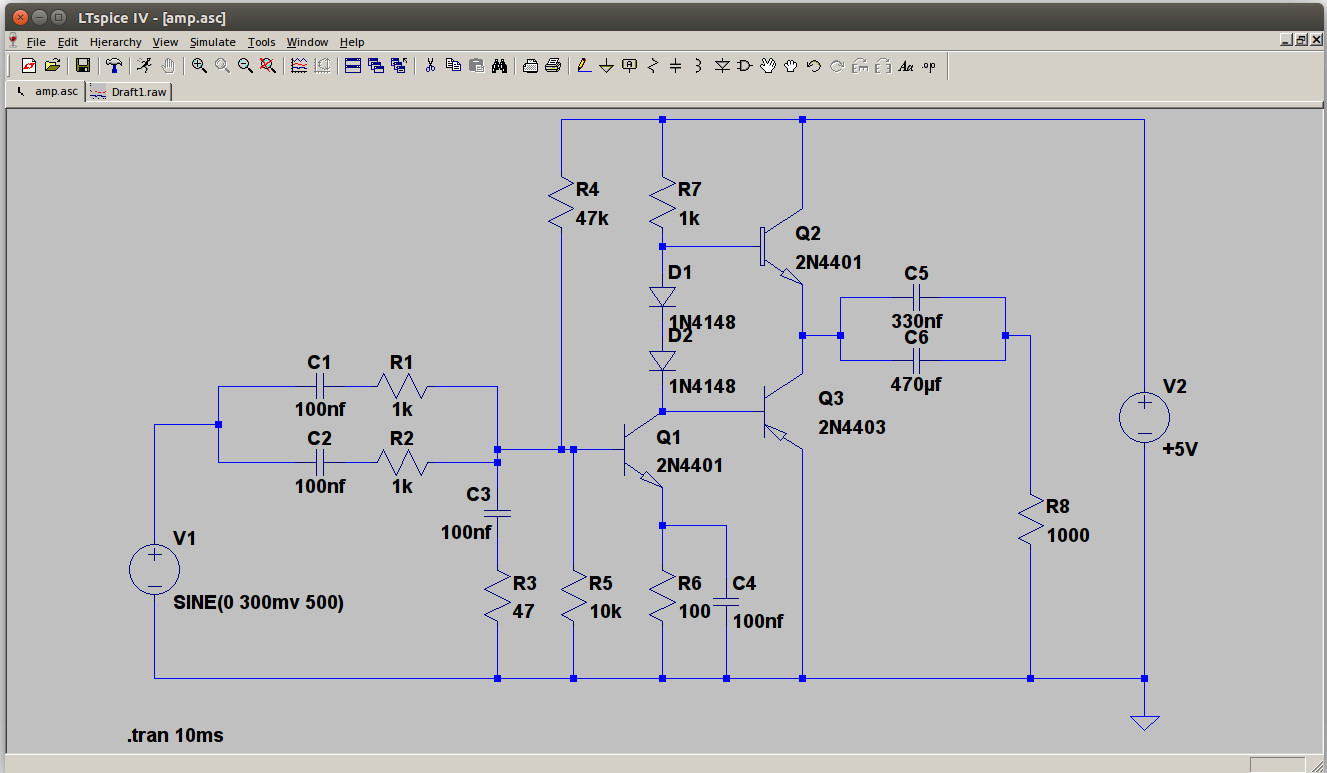
Figure 3 : LTSpice schematic
R1 N008 N007 1k
R2 N008 N010 1k
C1 N007 N006 100nf
C2 N010 N006 100nf
C3 N012 N008 100nf
R3 N012 0 47
R4 N001 N008 47k
R5 N008 0 10k
R6 N011 0 100
R7 N001 N002 1k
R8 N004 0 1000
D1 N002 N005 1N4148
D2 N005 N009 1N4148
Q1 N009 N008 N011 0 2N4401
V1 N006 0 SINE(0 300mv 500)
C4 N011 0 100nf
Q2 N001 N002 N003 0 2N4401
Q3 N003 N009 0 0 2N4403
C5 N004 N003 330nf
C6 N004 N003 470µf
V2 N001 0 +5V
.model D D
.lib C:\Program Files (x86)\LTC\LTspiceIV\lib\cmp\standard.dio
.model NPN NPN
.model PNP PNP
.lib C:\Program Files (x86)\LTC\LTspiceIV\lib\cmp\standard.bjt
.tran 10ms
.backanno
.end
Figure 4 : SPICE model
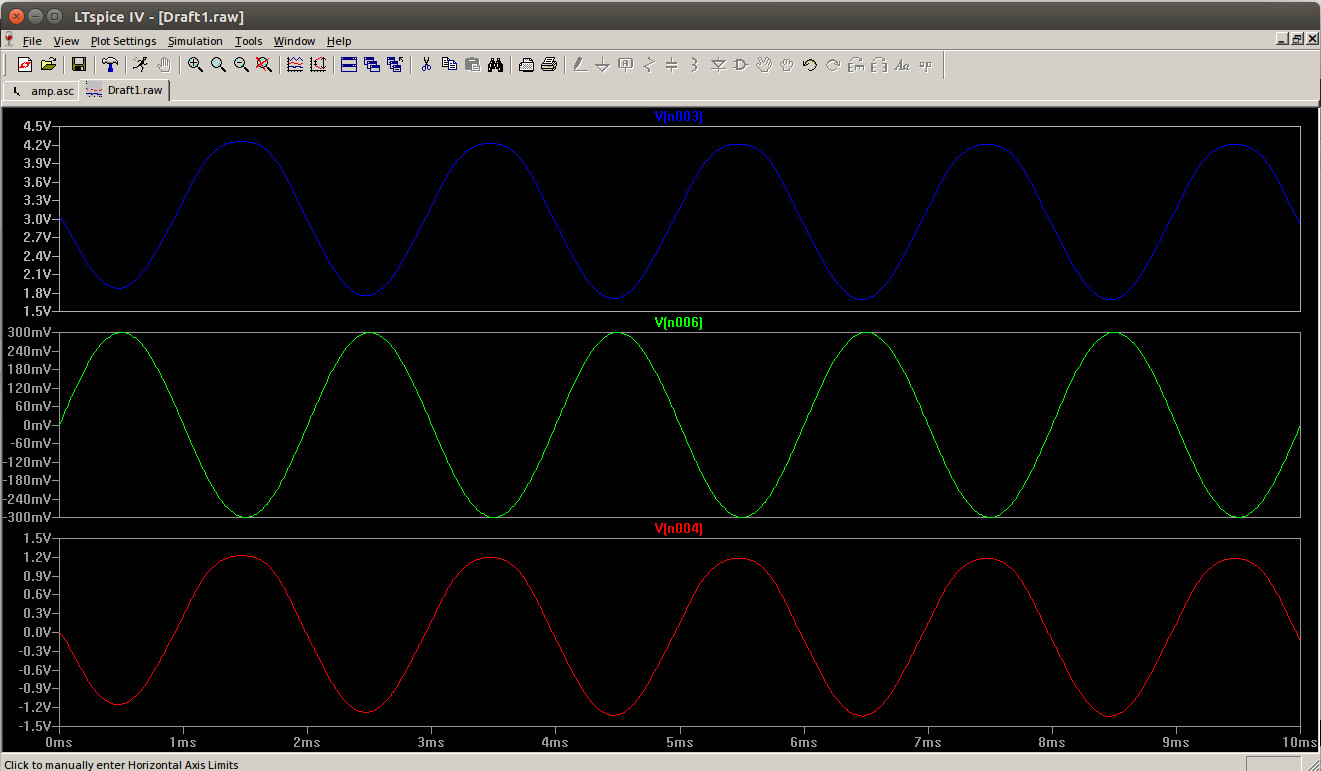
Figure 5 : LTSpice simulation
A nice feature in LTSpice is that you can use a .wav file as your input source and also record the output as a .wav file (Link). In LTSpice right click on an input voltage source value and use the wavefile command. To record the audio out add a SPICE directive from the edit pulldown:
wavefile="police_s.wav" chan=0
.wave "output.wav" 16 44100 vout
The simulation of this .wav file is shown in figure 6. Added a potential divider to give the input source a 50 ohm impedance and an output of the correct amplitude, the design file can be downloaded here(Link). Looking at these traces i.e. currents and voltages flowing through the transistors, i don't see anything too bad, therefore, not sure why some of the amplifiers self destructed, hmmm. The transistors do get warm, not boiling, but still not good. Perhaps ive burned out the speaker coils? Will need to test.

Figure 6 : SPICE simulation using .wav files
This amplifier is divided into three sections, a mixer, a simple stage voltage amplifier and a push-pull driver stage. The initial design was taken from (Link). The input mixer uses R1C1 and R2C2, the capacitors to block any DC bias and pass the signal, 1K values were chosen just to limit the current, assumed the output from the pi would be a 50 ohms. R3C3 was there to try and remove 'clicks' when operating did get a little digital noise from the pi, i hoped a series 1nF and 47 ohms would just snub these transients a little (you could probably loose this bit). R4R5 set the bias point for the class A amplifier
TO FINISH
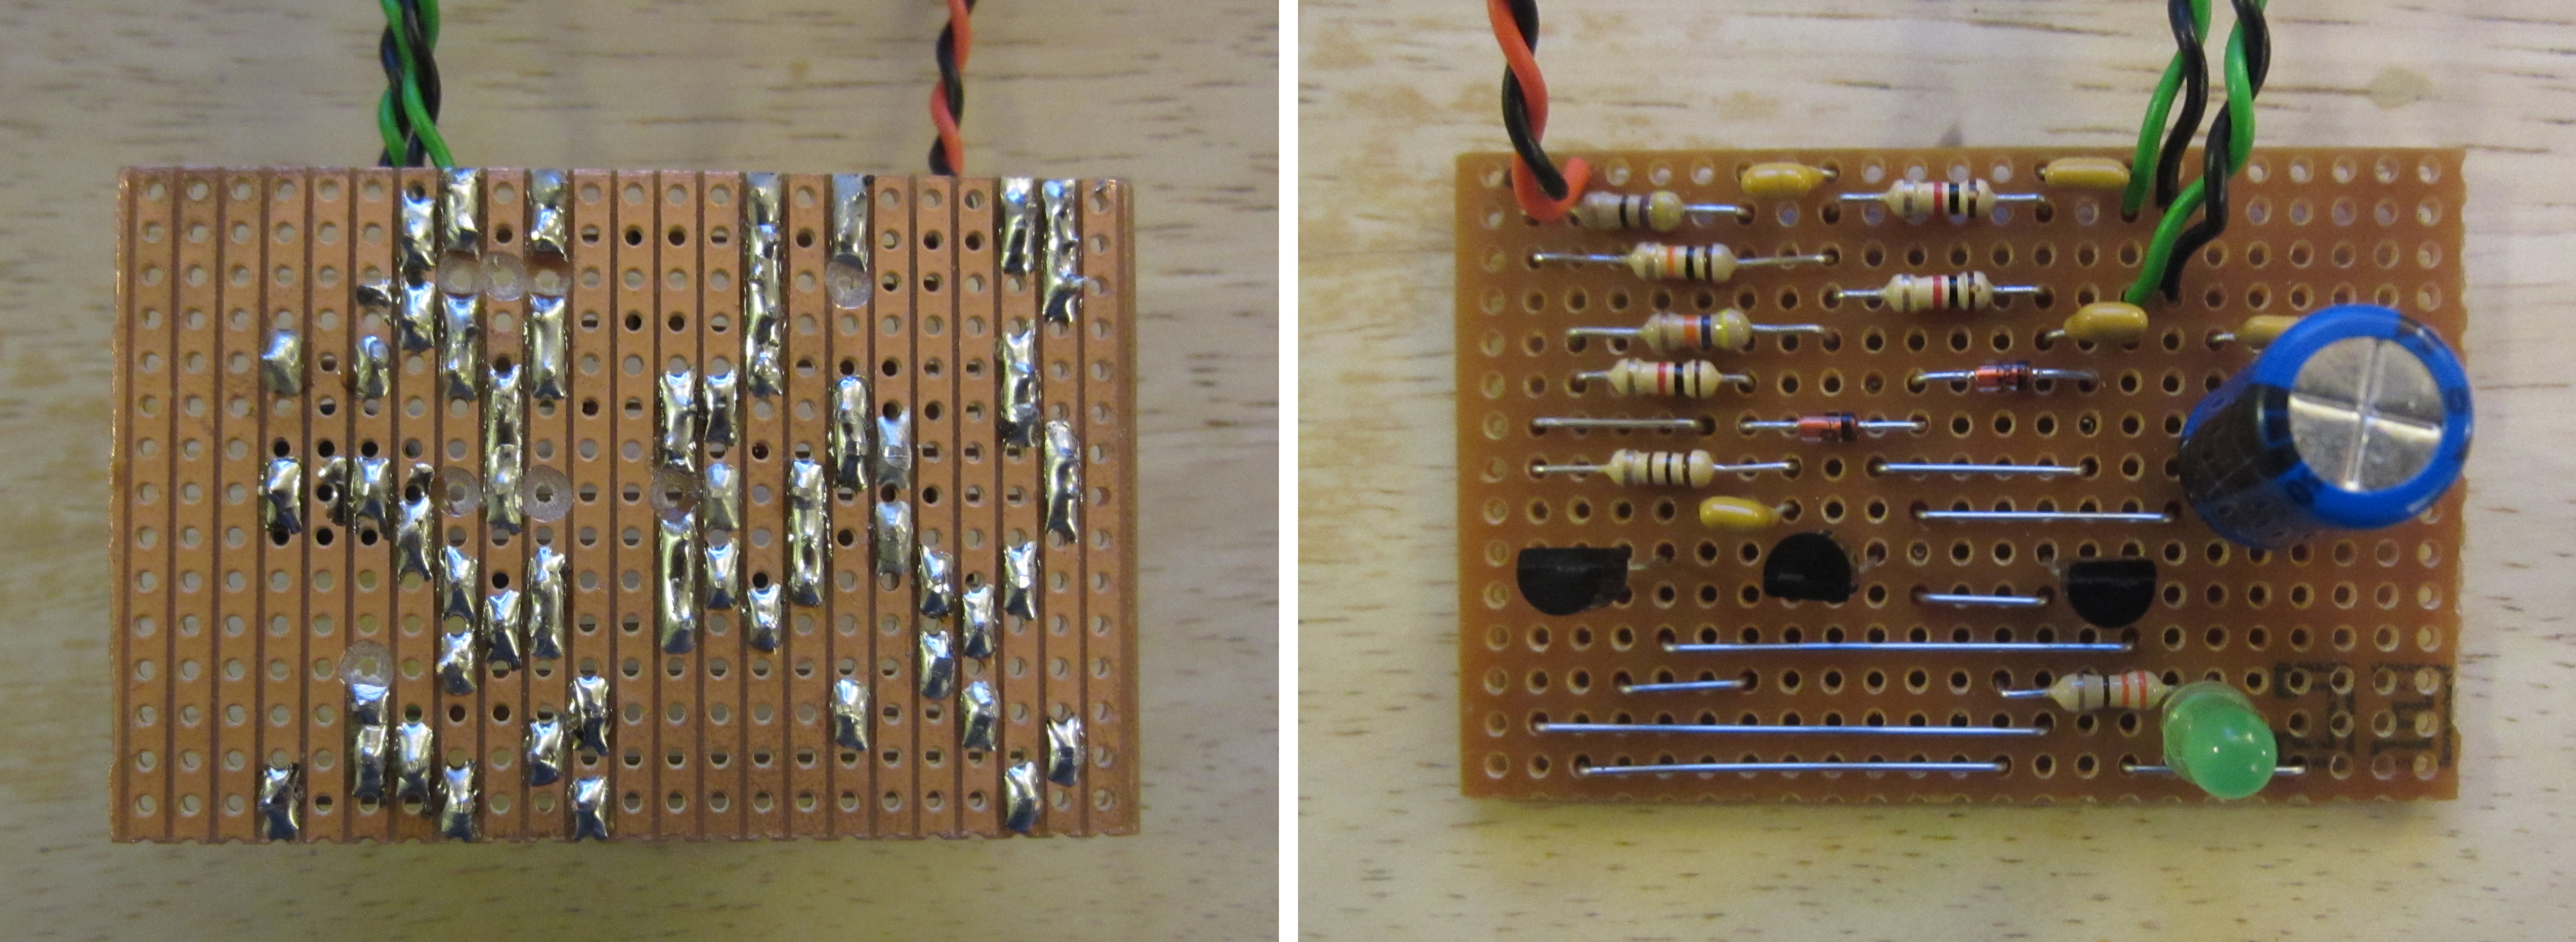
Now that the circuit has been roughed out made an initial prototype of bread board. Always like to do this, golden rule of any simulation are that the results are only as good as the model used, sometimes you are unaware of quite how the simulation, any result will have errors, always good to test just to make sure.
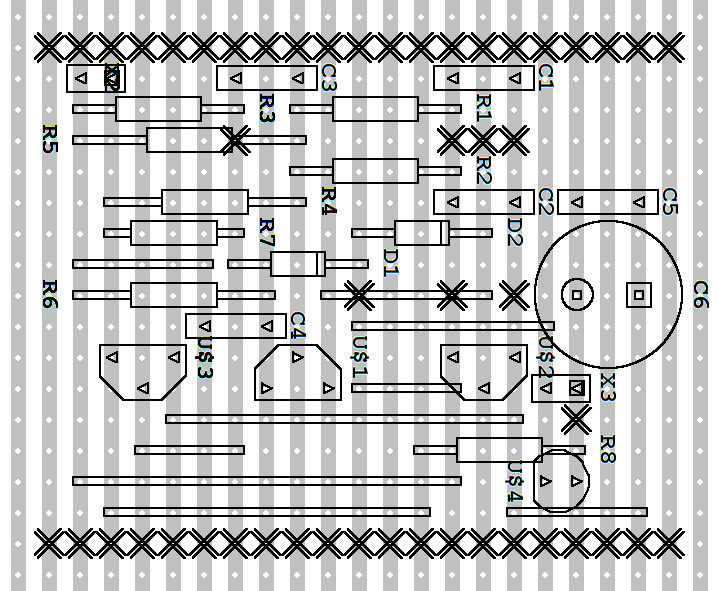
To implement this on veroboard i used VeeCAD, the netlist was generated from an Eagle schematic. The Eagle schematic can be downloaded here: (Link).
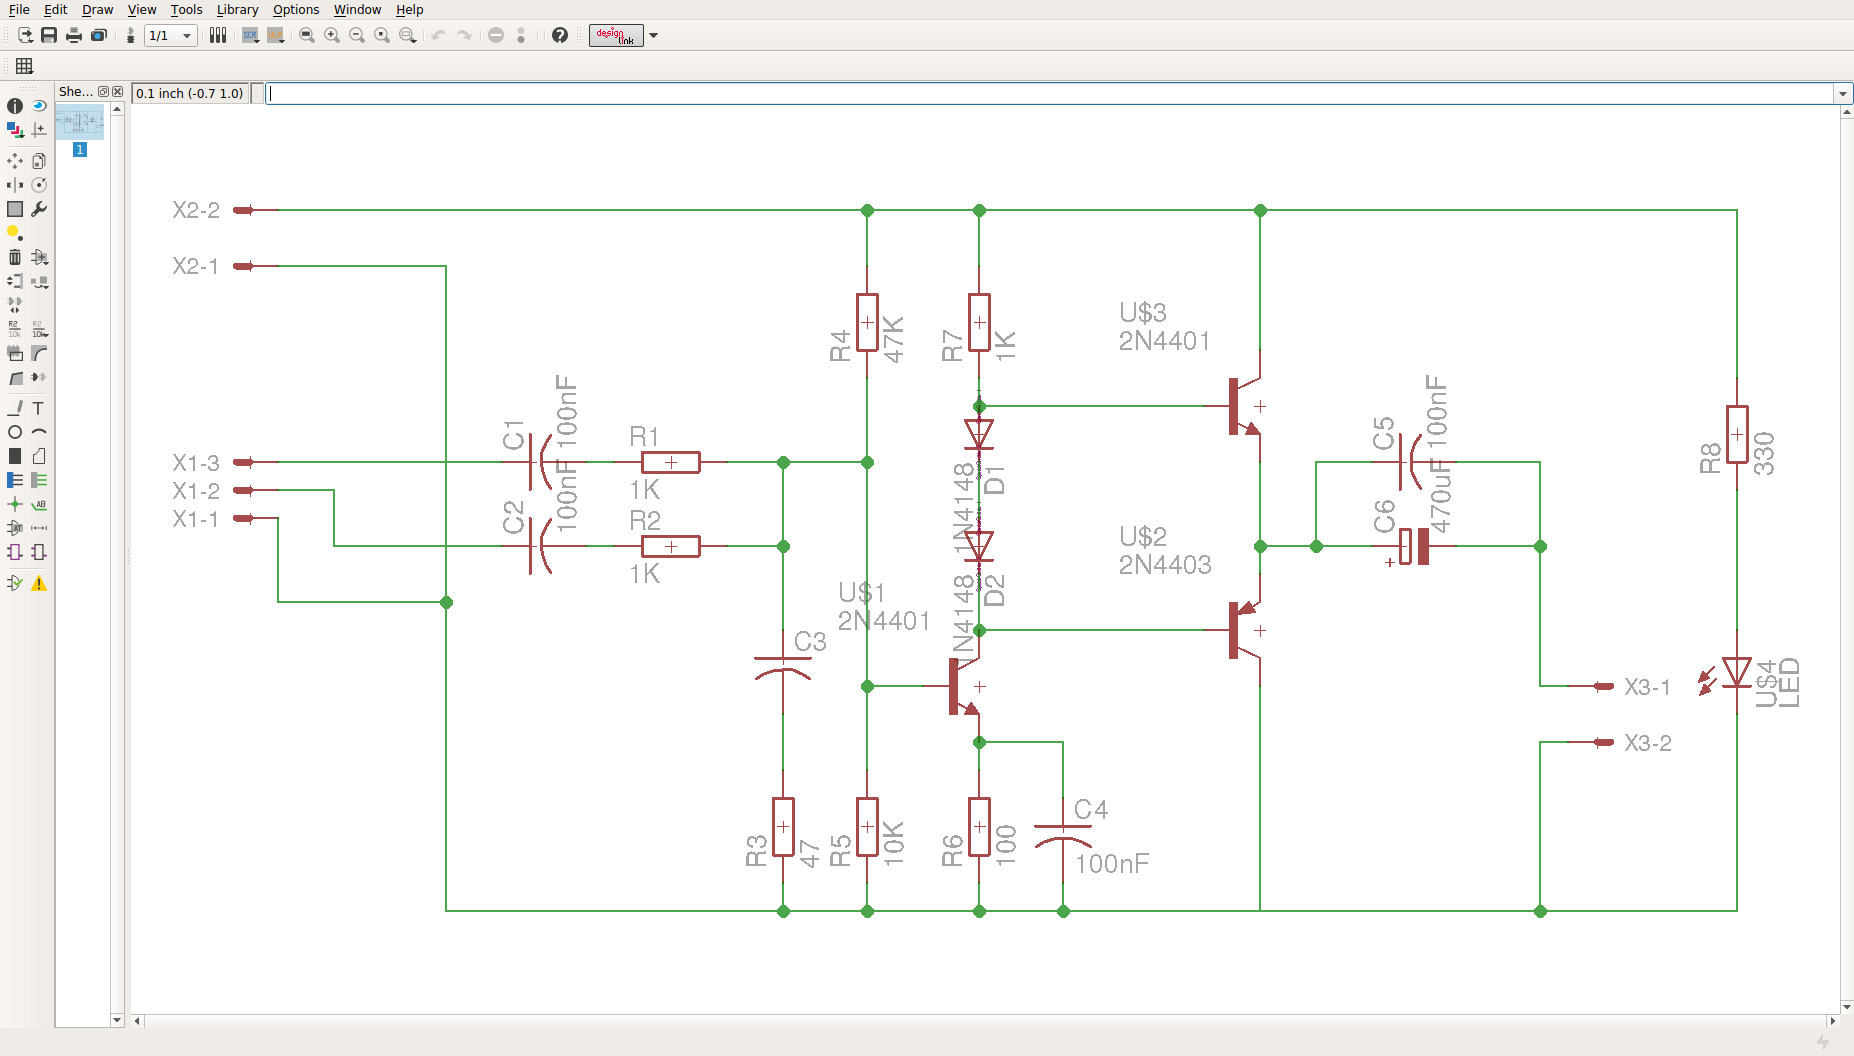
Figure 7 : eagle schematic
The more difficult bit. Had a look around, there were a few different solutions, but the easiest to setup was Amazon's Alexa for the Pi, but that discussion is another project...

This work is licensed under a Creative Commons Attribution-NonCommercial-NoDerivatives 4.0 International License.
Contact details: email - mike.freeman@york.ac.uk, telephone - 01904 32(5473)
Back