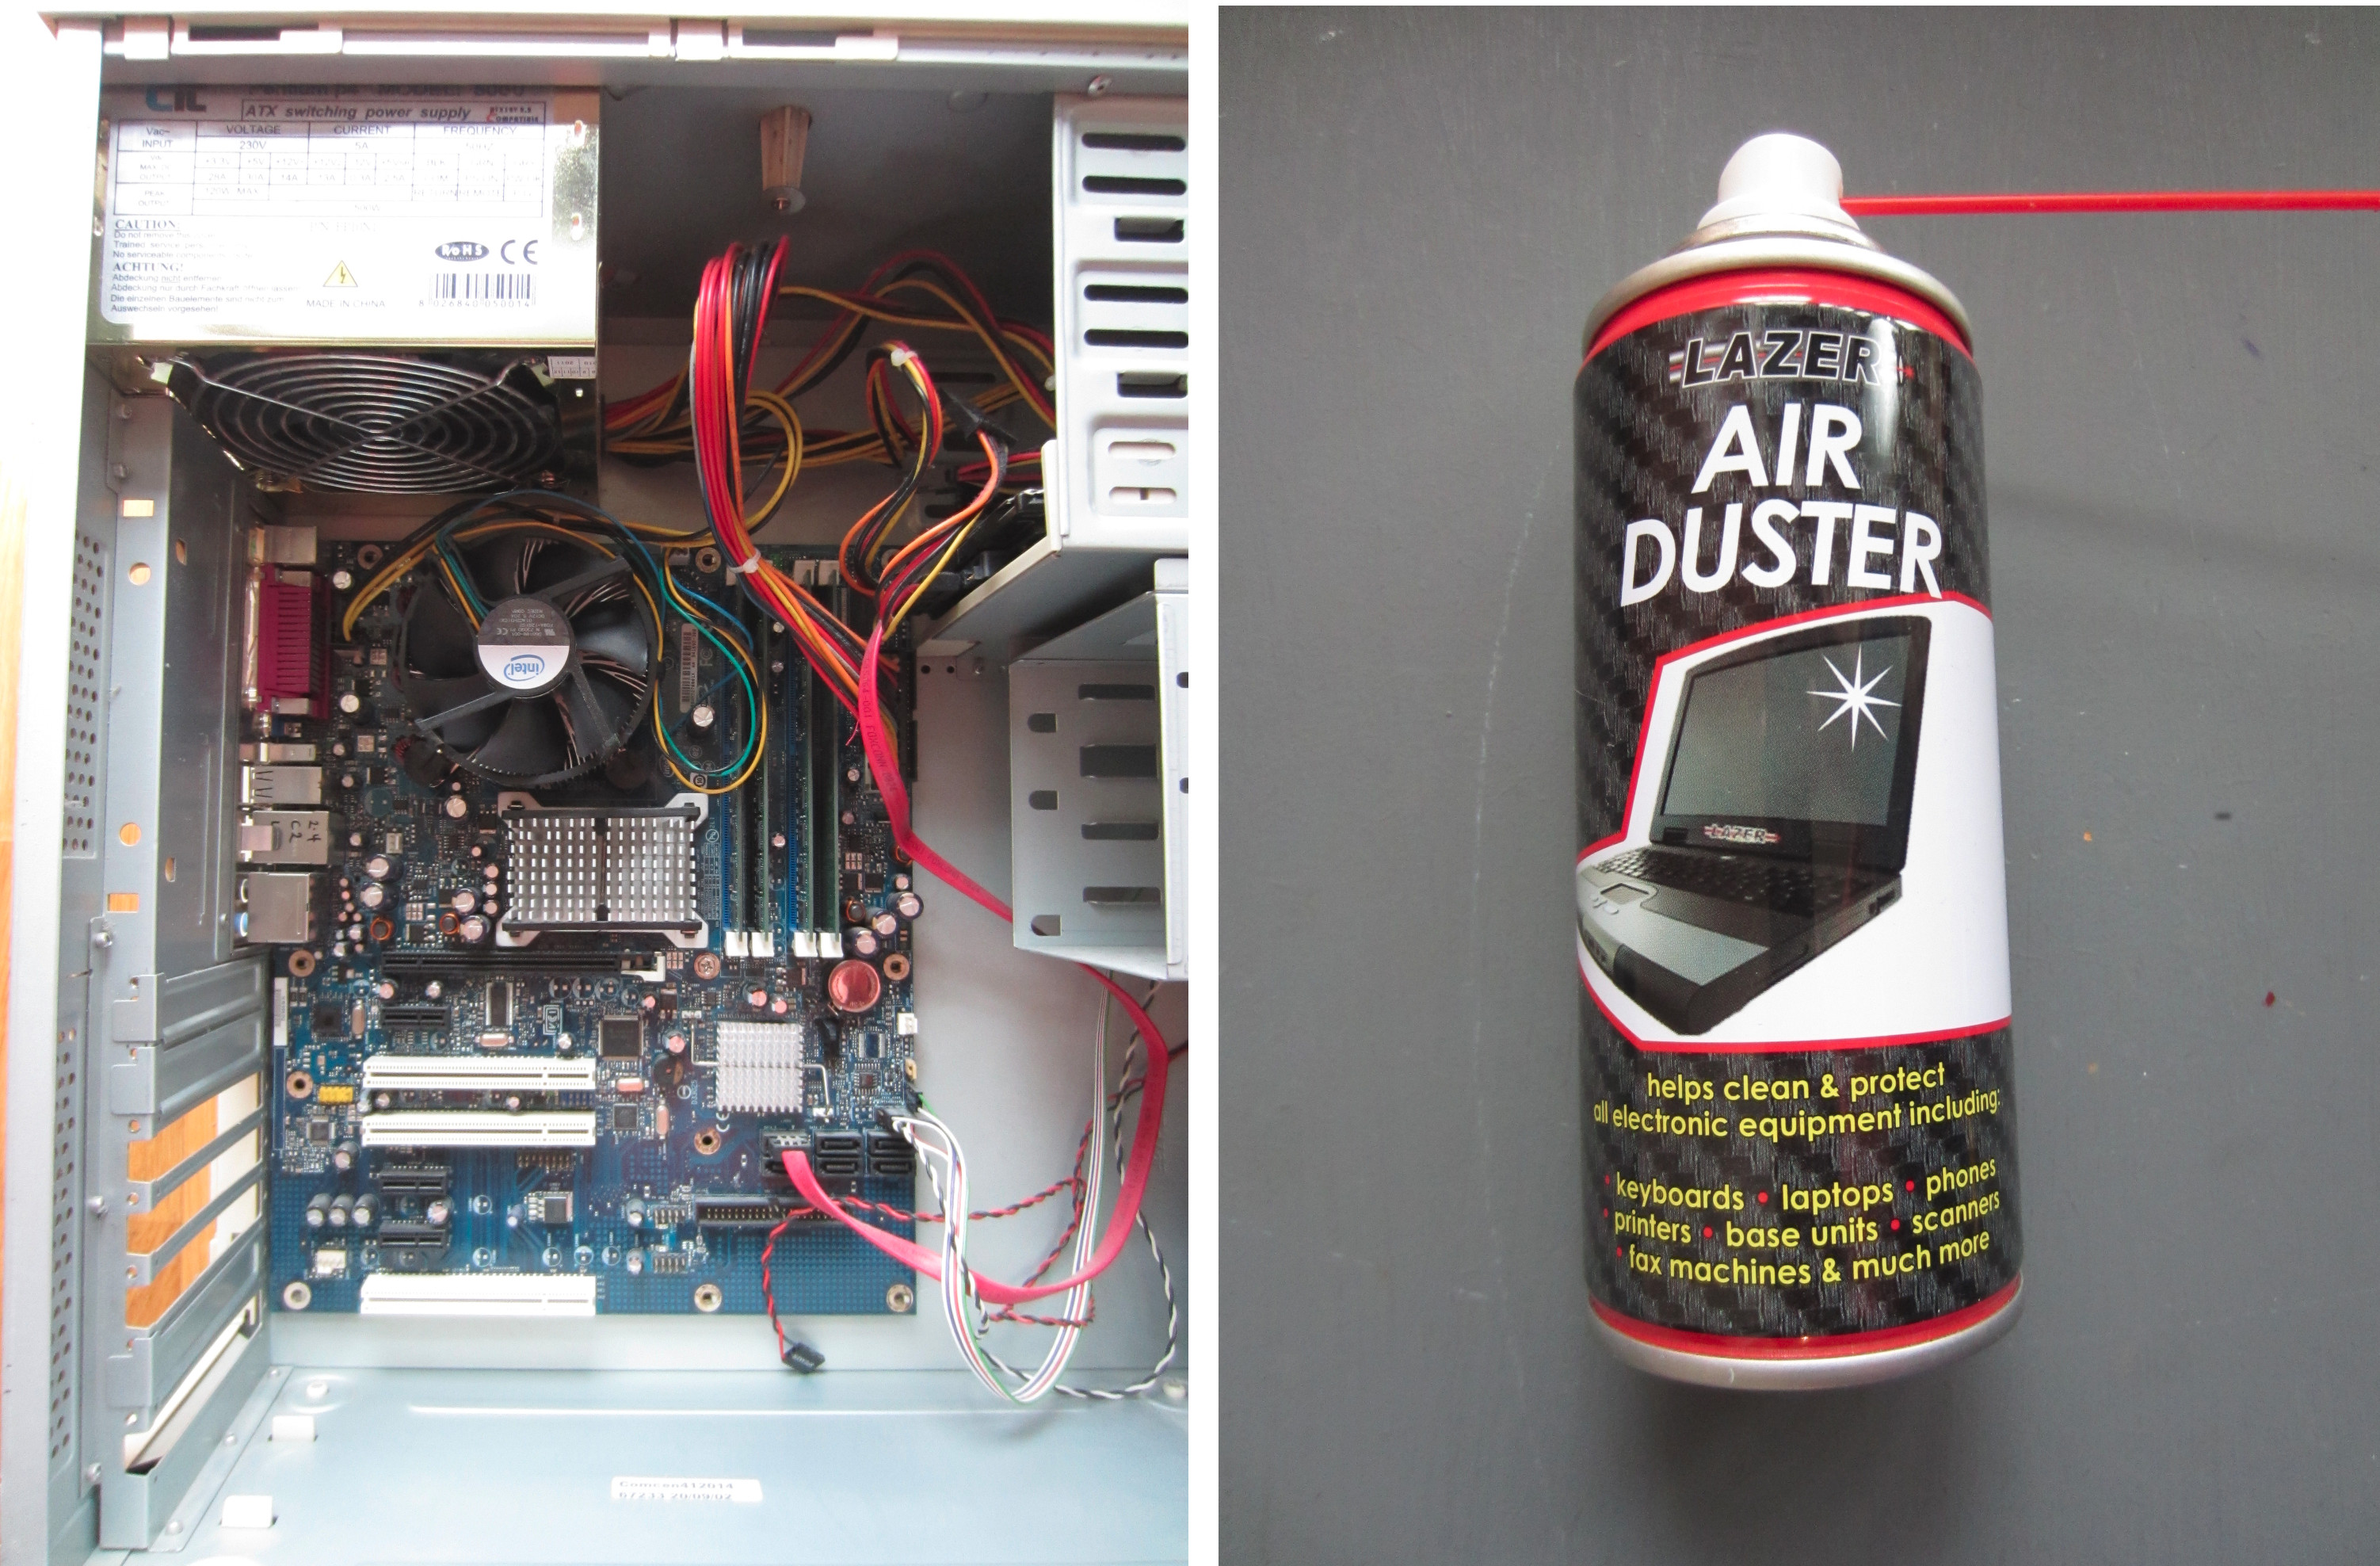
Given all the joys in the world wanted to build a firewall, to add an extra layer of protection to my home network, but mostly to separate the different users / networks in the house onto different subnets, then control / balance bandwidth between the users. Well when i say balance what i really mean is when i need bandwidth i wanted the power to prioritise my traffic, lag is the other persons problem :). To achieve this goal went to my PC graveyard, a pile of old PC parts not really useful as main desktop machines any more, but still usable for this type of task. Also decided to put in a wifi card to have a separate access point, to try and improve coverage a little (add directional antennas), as the wifi interface on the router didn't't really cover the back of the house i.e. no external antenna, wifi signals don't like travelling through multiple walls. The starting point for this creation was an old Core 2 Duo E4500, running at 2.2GHz with 8GB of RAM and a 160GB hard disk, as shown in figure 1.
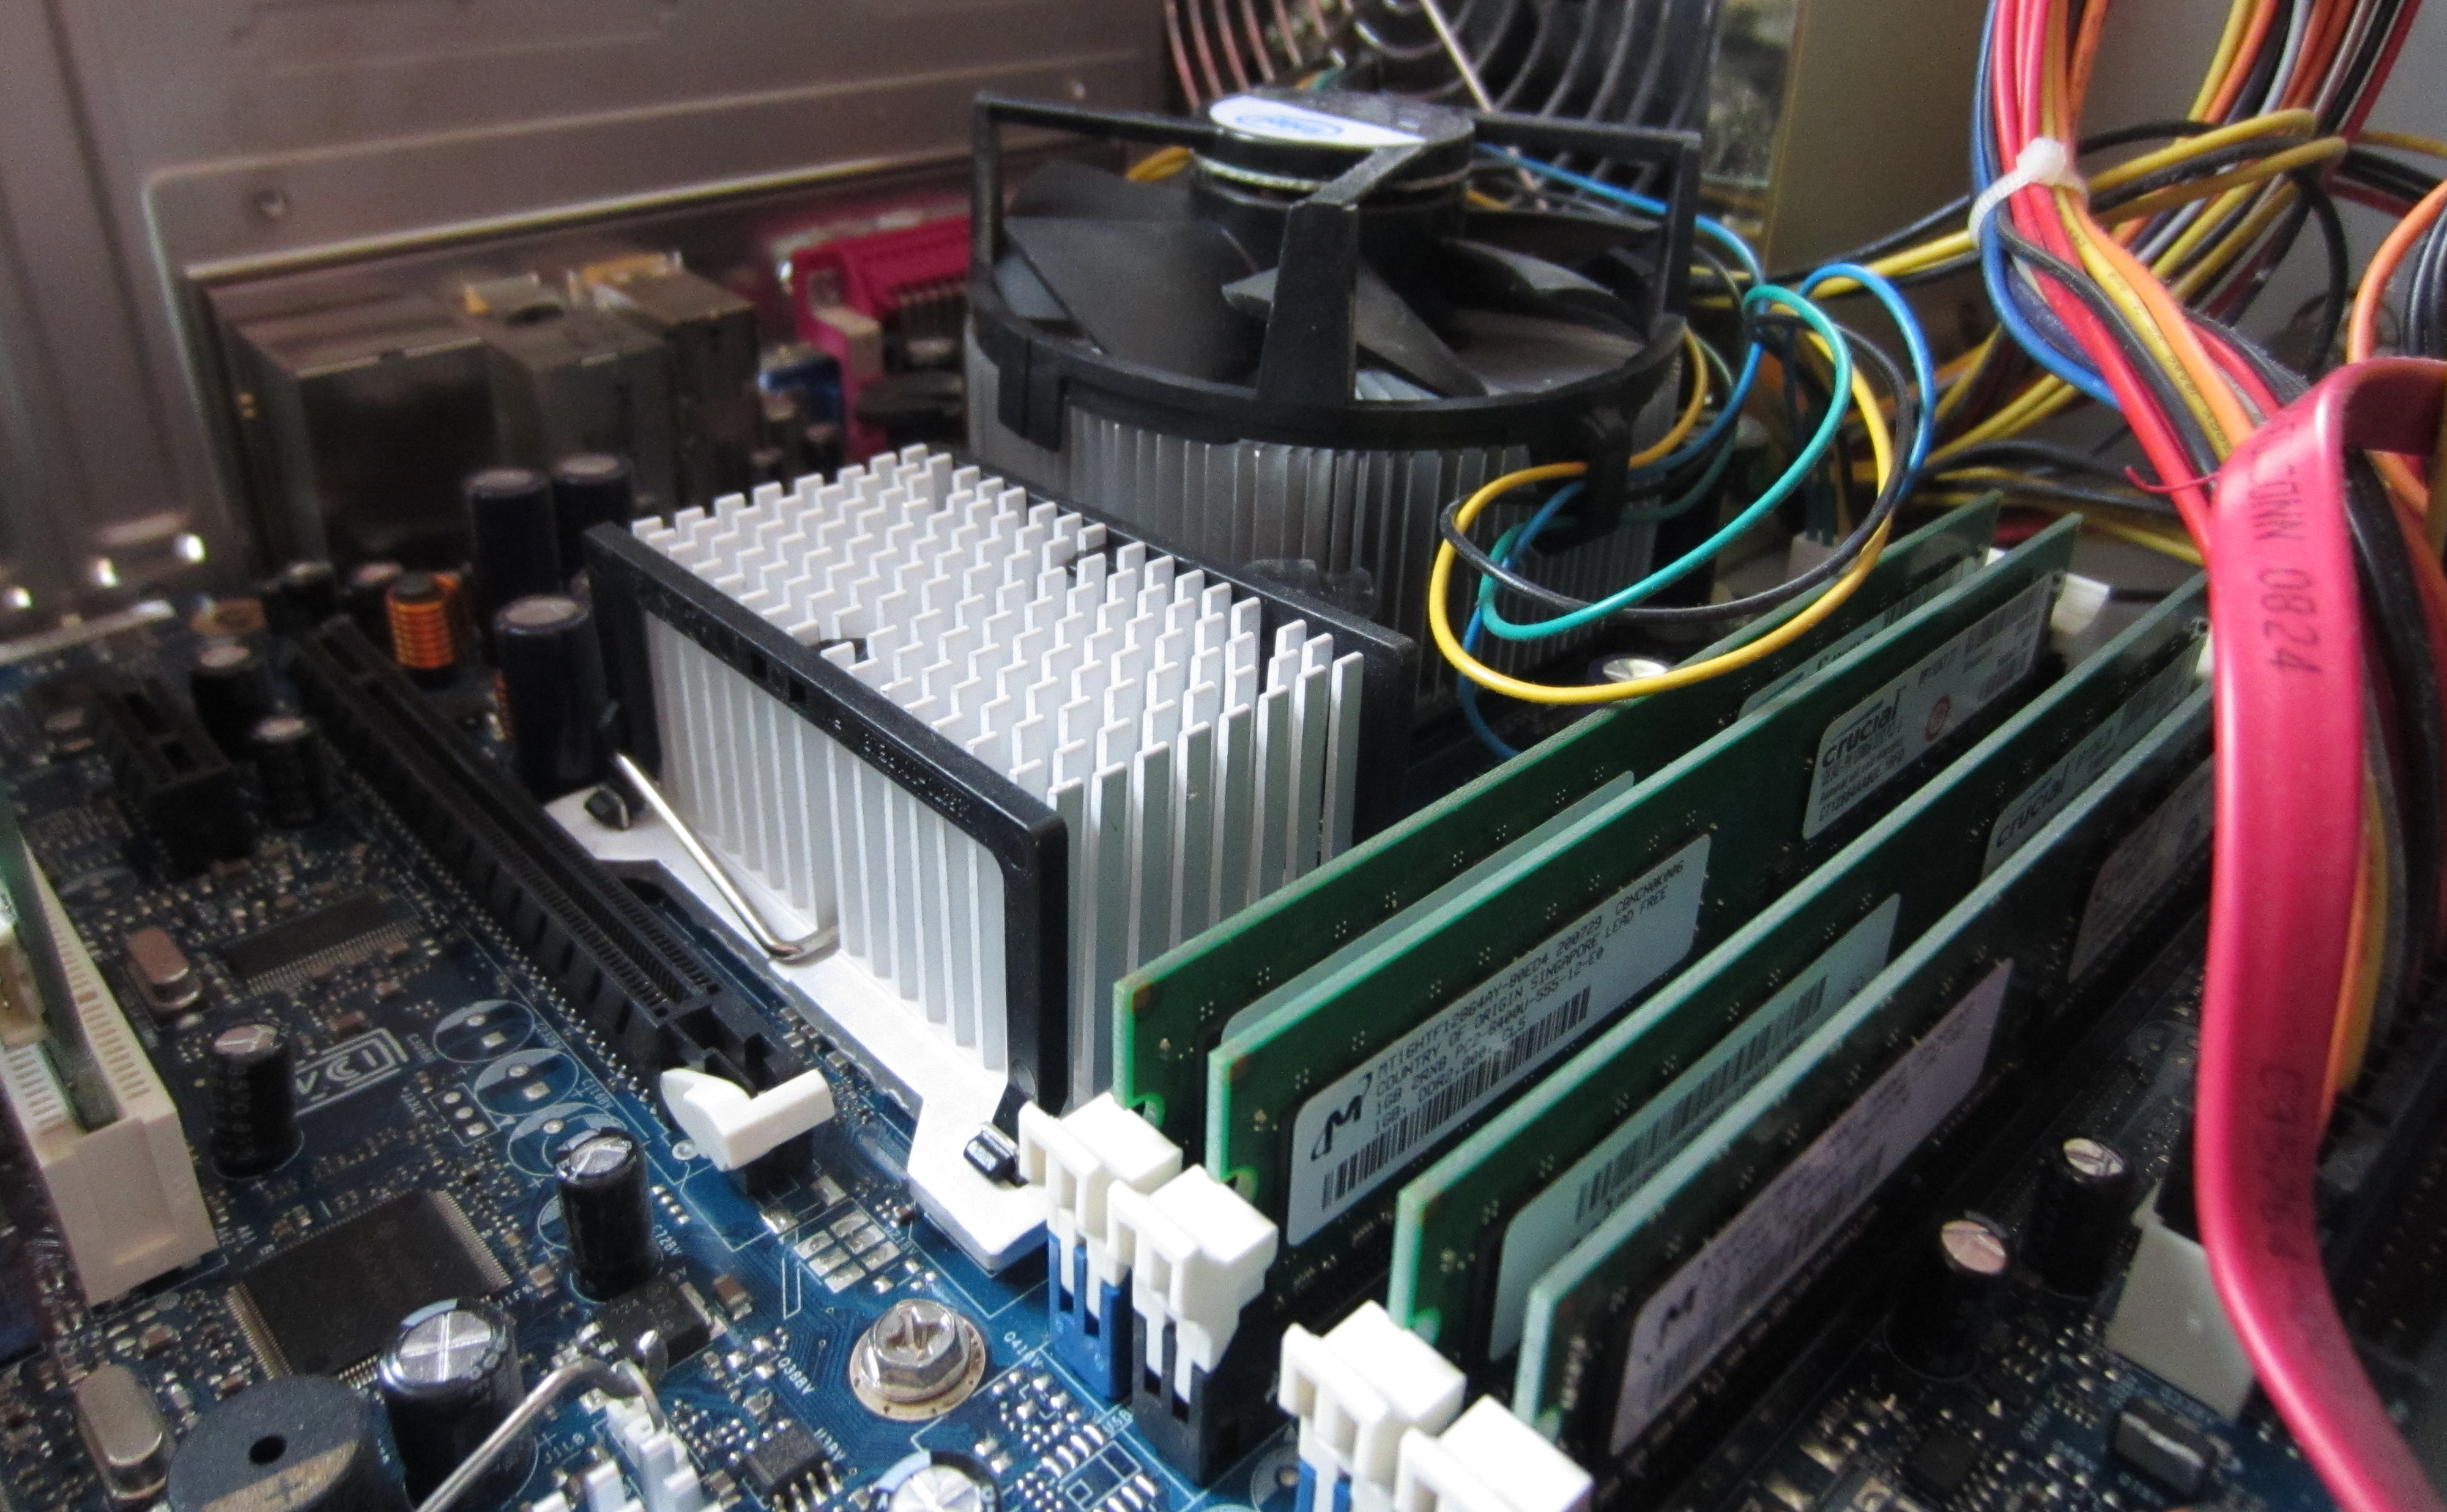
Figure 1 : FireWall PC (top), all clean (bottom)
This was a very old, well used box that had stood in the junk pile for a few years, as a result everything had a thick layer of insulating dust, to keep it warm in its old age. To be honest have never seen a CPU heatsink so clogged up with dust, you could not see through the fins. Pound land to the rescue, canned air :). Short bursts is the key combined with a hover to try to pick up most of the dust, dead skin, hair, dead bugs, stuff ... Note, don't make the bursts too long as the liquid propellant starts to spray out i.e. the electronics will get wet. Did this once on a CD player, got carried away, had to wait a week for it to dry out. Next, network cards, as shown in figure 2
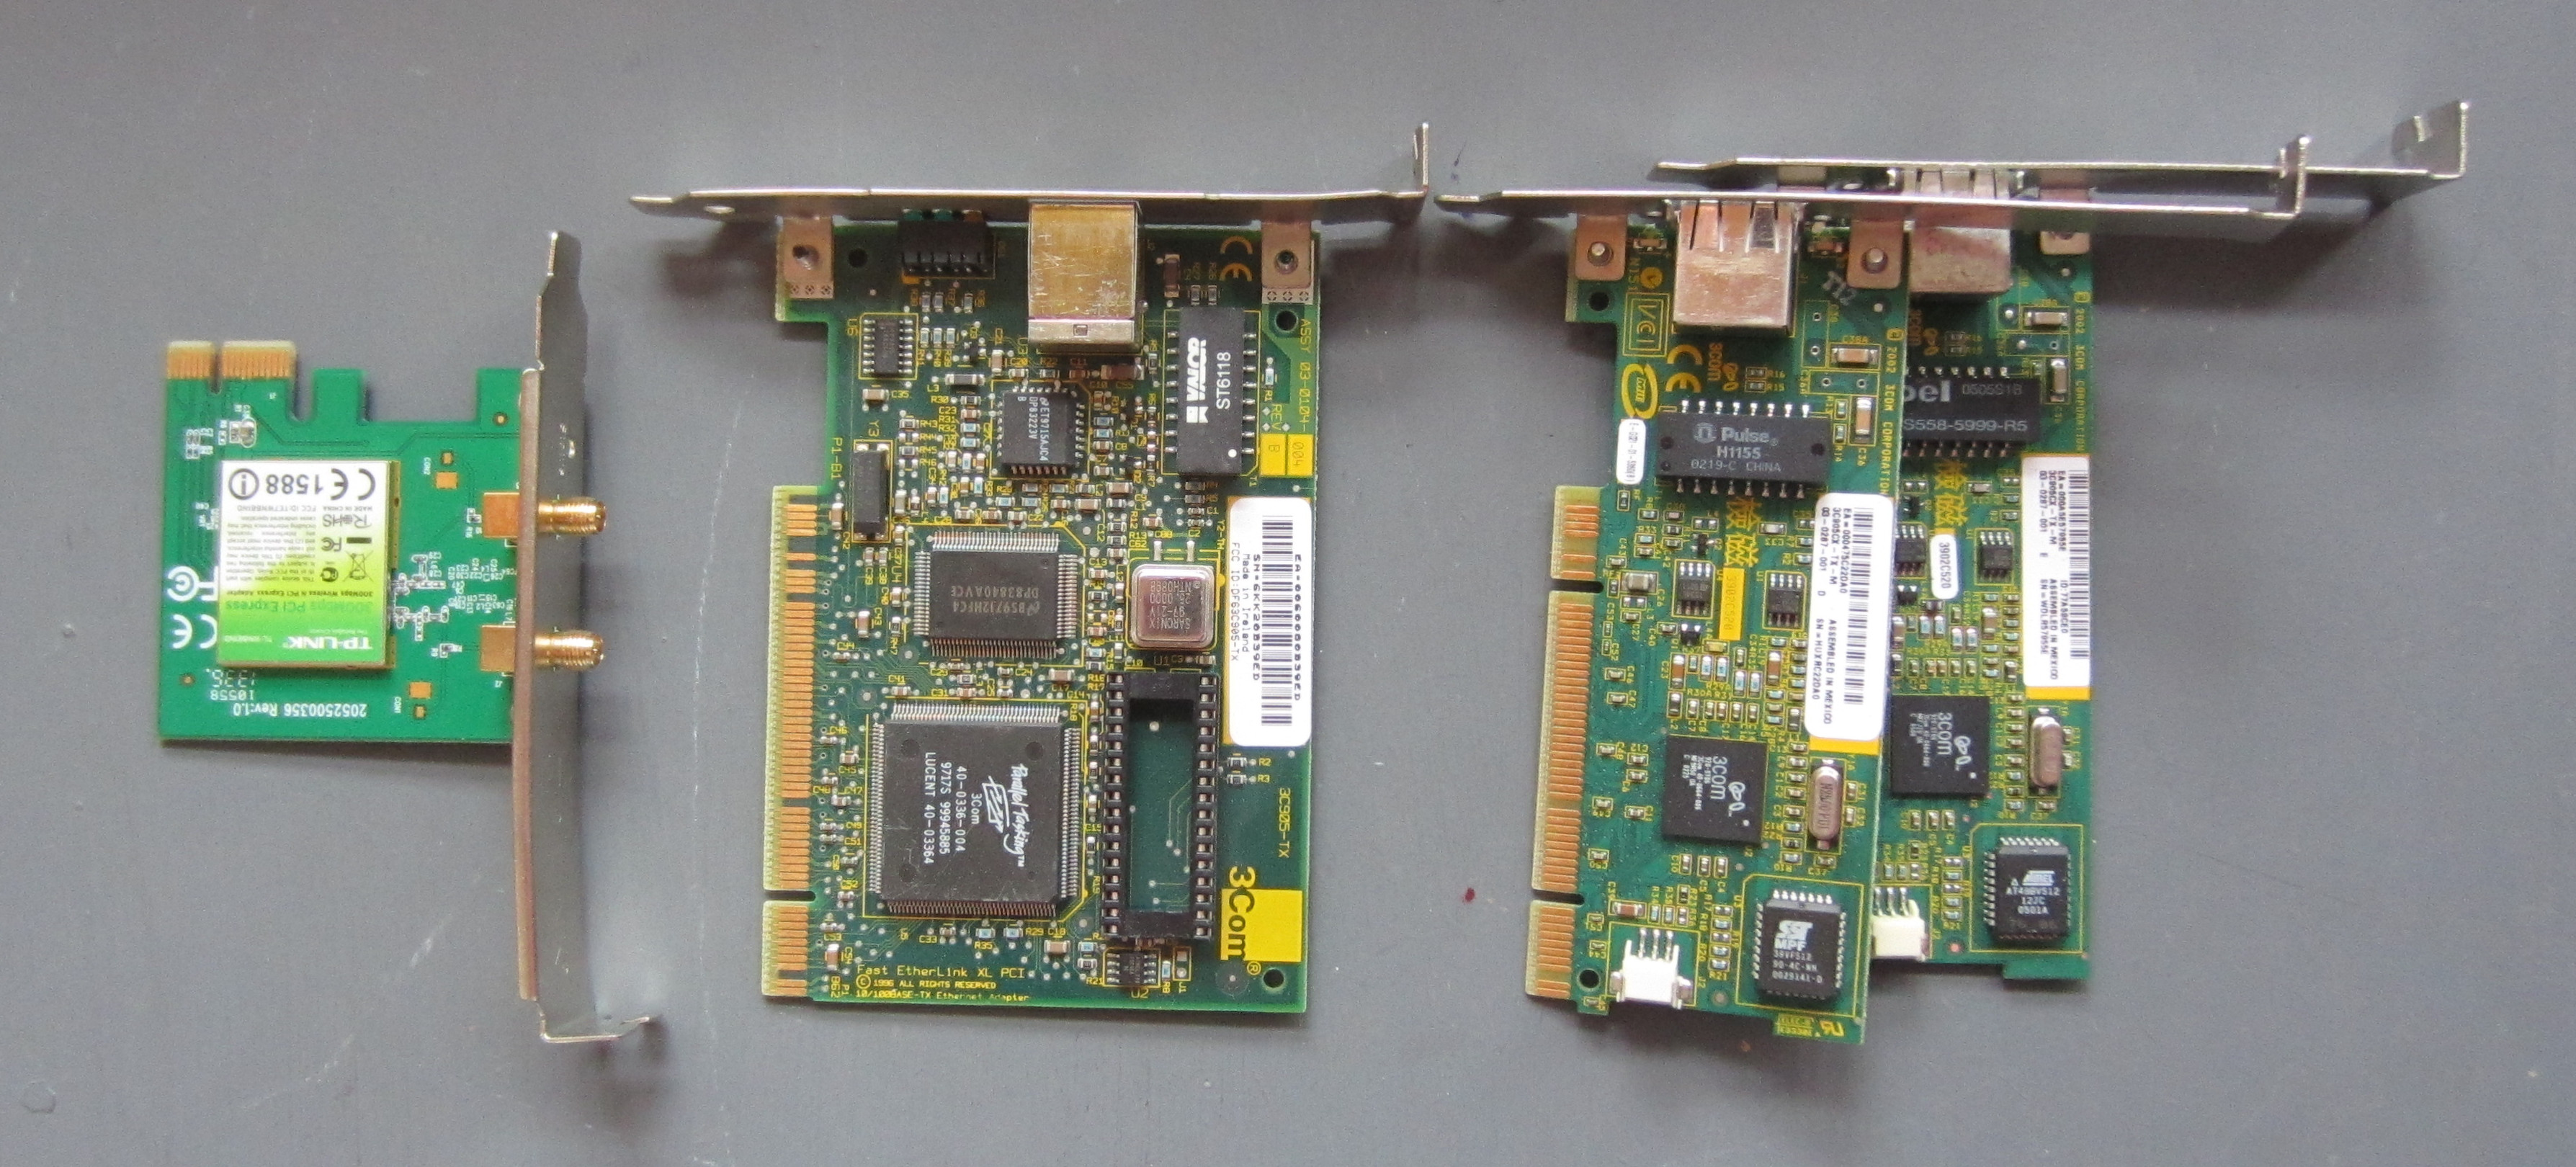
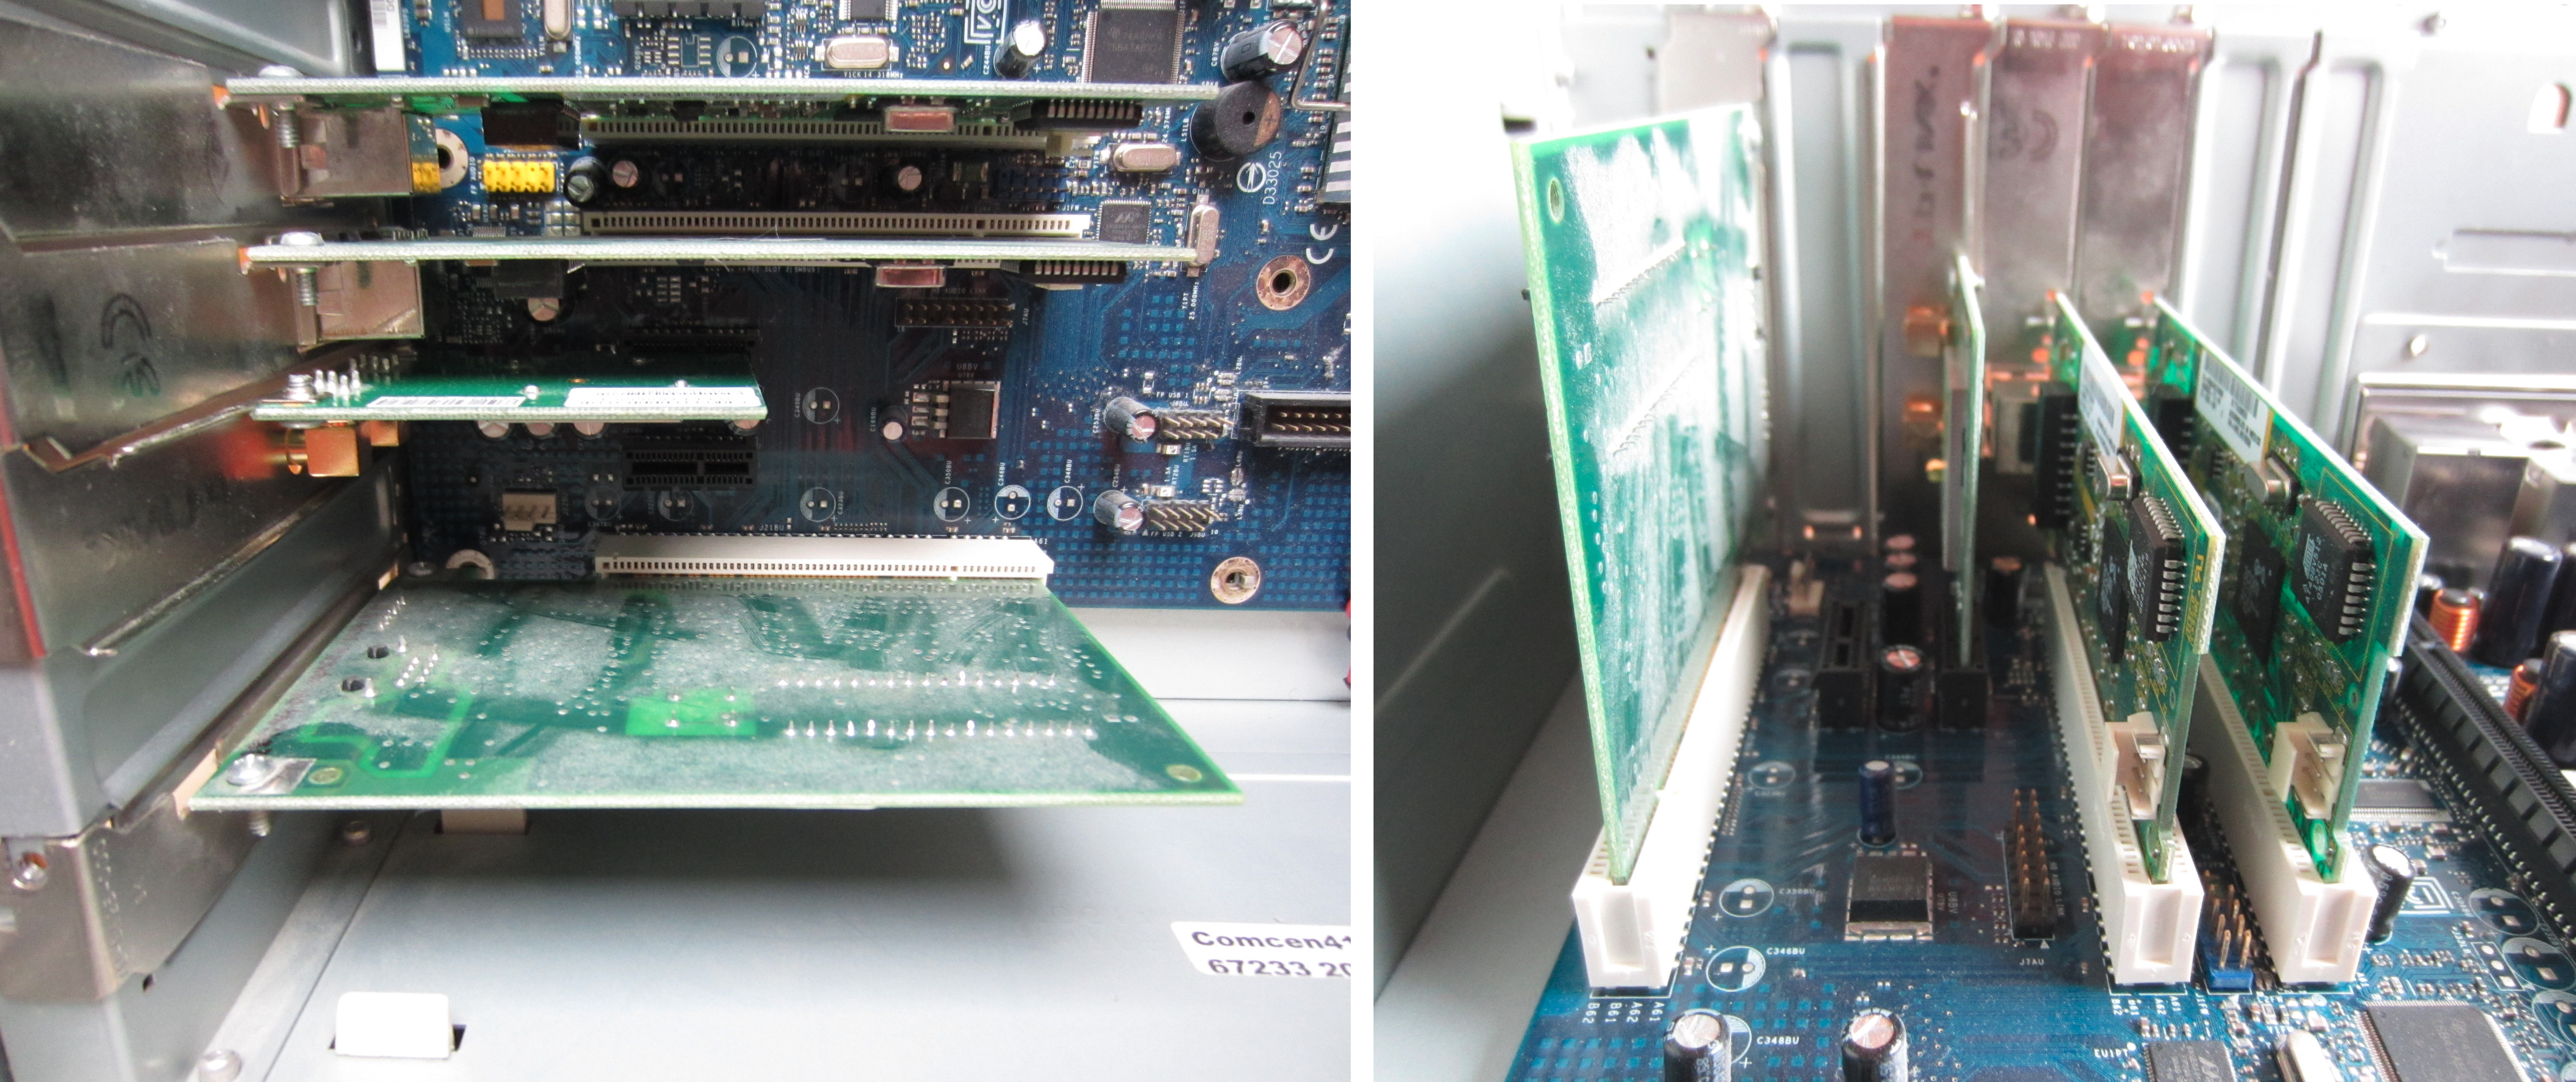
Figure 2 : Network cards
Needed three extra PCI network cards, one for each room, plus the network interface on the motherboard. In addition to these also need a PCI wifi adaptor. The PC has a 500W power supply, so power isn't an issue, expect from a green point of view, this power supply is again quite old so not as efficient as a modern beast, also fan is a little noisy. Again, only the best interfaces, three 100Mbps cards (3COM 3c905) and 300Mbps wifi interface (TP-LINK). Normally, i would be thinking of Giga-bit interfaces, but as my home router's max bandwidth is 12Mbps and the main traffic is in and out of the house, rather than between internal machines, these network cards will be fine as the connection out of the house is the main bottleneck.
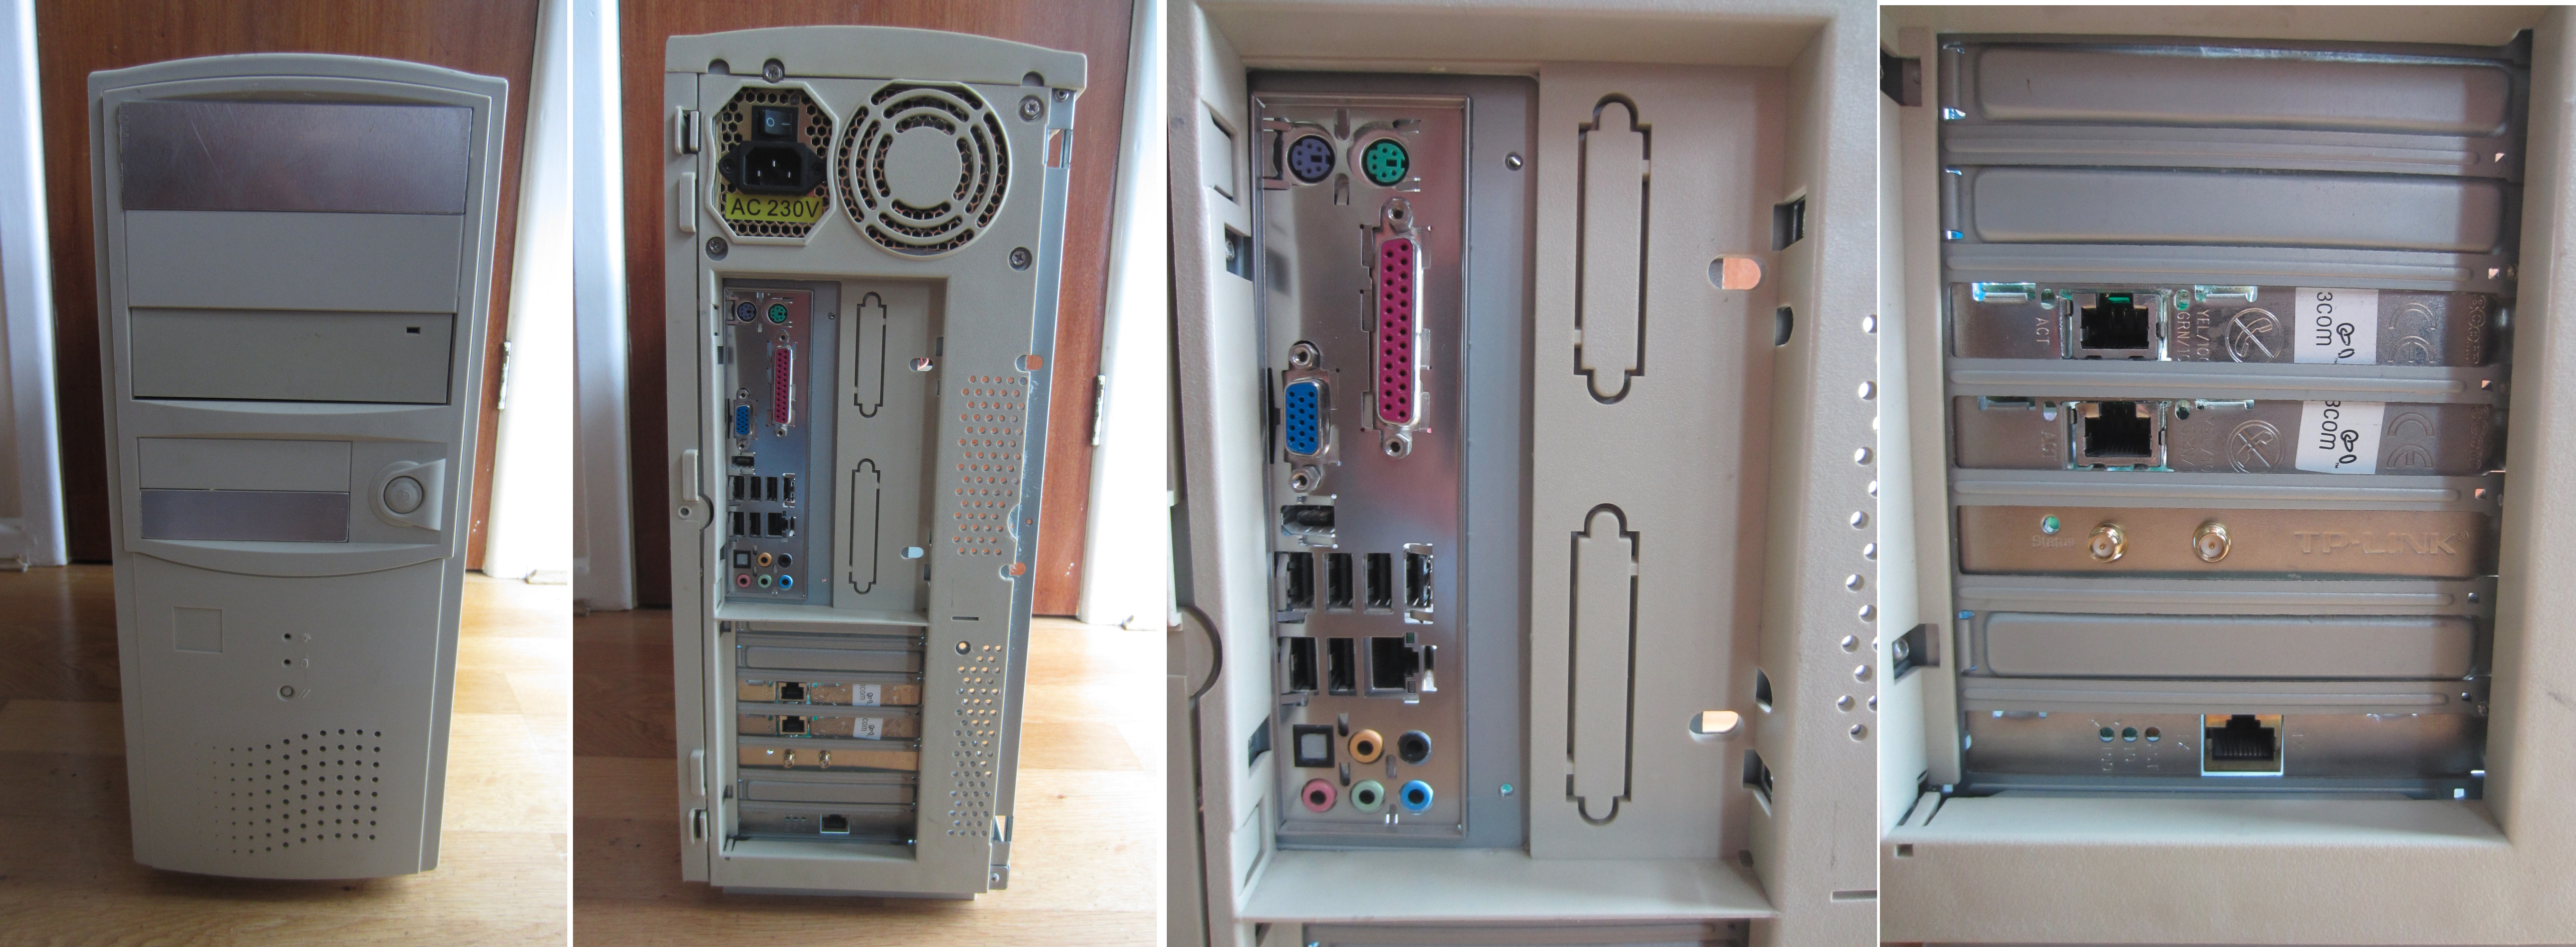
Figure 3 : PC case
OS time, went for Lubuntu 16.04.4, did try the default Ubtunu first, but, the 3D elements in the window manger really knocks the performance on these older machines e.g. moving the mouse, windows etc. The LXDE desktop is a lot smoother and as this machine's main purpose is not typical desktop top applications this setup works fine. Do confess i still like to install OSs from CD/DVD, USB is fine, but you always have to mess around getting the ISO onto the USB stick, then there are joys of 32/64bit OSs, then when you plug it into the box it doesn't boot ... DVDs just work.
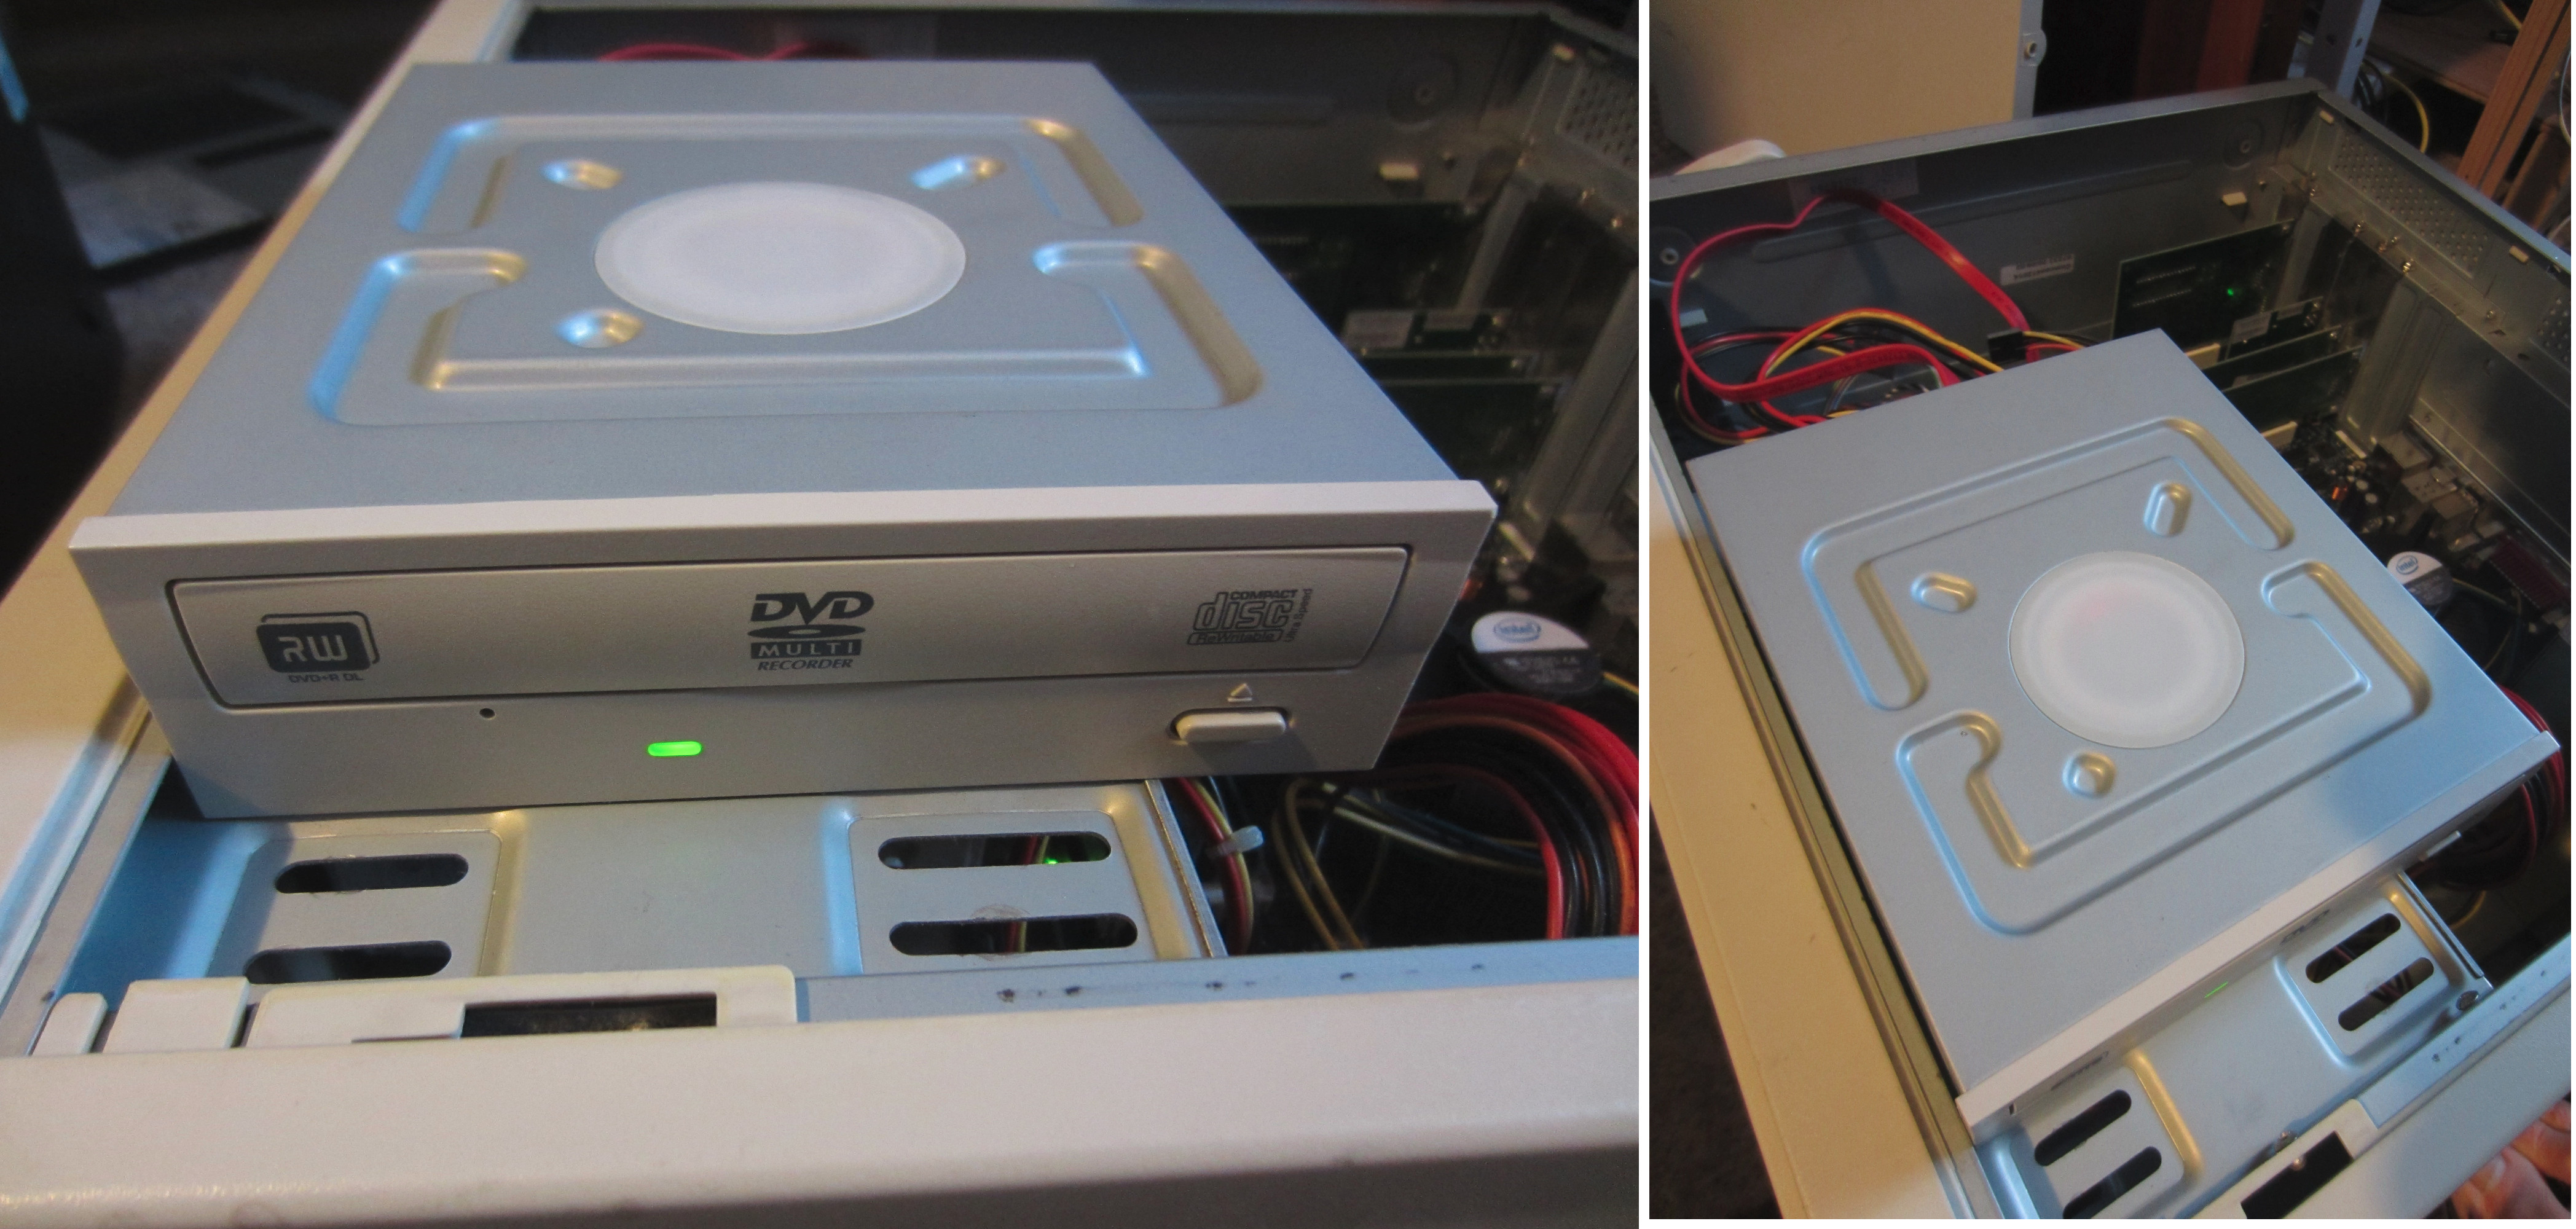
Figure 4 : DVD - the future :)
Controlling the flow of packets between the network interfaces can be done in a number of different way, i use iptables, it works for me, so have not looked into the other approaches. First thing to do is to configure the network cards. This depends on your version of Linux, for this one we are still in the land of /etc/network/interfaces, even if the familiar eth0, eth1 ... have now gone. Note, to find out the names of these interface i use ifconfig, this is now also an out of date command, therefore, you may need to install this with:
sudo apt-get install net-tools
The interfaces file defines how these interfaces are assigned their IP addresses. Notes, network interface names will vary on different machines. In my case enp6s2 is connect to the router, so this interface uses dhcp (Dynamic Host Configuration Protocol) and is assigned an IP address by the router. On the router the assigned IP address is configured to be a fixed IP address (same IP address each time) to simplify debugging etc. When this interface comes up the iptables rules are loaded defining blocked/open ports and forwarding between interfaces. The remaining interfaces are static, assigned separate private subnets.
auto lo
iface lo inet loopback

auto enp6s2
iface enp6s2 inet dhcp
	pre-up iptables-restore < /etc/network/rules.v4

auto enp6s1
iface enp6s1 inet static
	address 192.168.10.254
	netmask 255.255.255.0
	broadcast 192.168.10.255
	dns-nameservers 192.168.1.254

auto enp6s0
iface enp6s0 inet static
	address 192.168.20.254
	netmask 255.255.255.0
	broadcast 192.168.20.255
	dns-nameservers 192.168.1.254

auto enp0s25
iface enp0s25 inet static
	address 192.168.30.254
	netmask 255.255.255.0
	broadcast 192.168.30.255
	dns-nameservers 192.168.1.254

auto wlp3s0
iface wlp3s0 inet static
        address 192.168.50.254
        netmask 255.255.255.0
        broadcast 192.168.50.255
        dns-nameservers 192.168.1.254
Figure 5 : /etc/network/interfaces
To allow network traffic to be transferred between these network interfaces i.e. a path from the local subnets to the external router, you must be explicitly enabled this in the file /etc/sysctl.conf, uncommenting the line:
net.ipv4.ip_forward = 1
To configure the iptables rules i wrote a script (below), do confess i don't understand all the subtleties of iptables, the rules below define which ports are blocked or open, the only one explicitly blocked in this example is SSH (22), as i didn't want the front facing machine accessible over the network, other ports can be opened/used if established or related to existing connections, default rule is to block. This script has been cut-down, in the actual one i explicitly blocked a number of the standard port in an attempt to stop traffic accidentally going out of the house.
#!/bin/sh

#First, delete all existing rules
iptables --flush
iptables --delete-chain
iptables --table nat --delete-chain
iptables --table nat -F
iptables --table nat -X


#########
# INPUT #
#########

iptables -A INPUT -p tcp --dport 22 -j DROP
iptables -A INPUT -p udp --dport 22 -j DROP

iptables -A INPUT -m state --state ESTABLISHED,RELATED -j ACCEPT
iptables -A INPUT -i lo -j ACCEPT

# Debug
iptables -A INPUT -p icmp -j ACCEPT

#########
# OUPUT #
#########

iptables -A OUTPUT -o lo -j ACCEPT

# Debug
iptables -A OUTPUT -p icmp -j ACCEPT

# WEB
iptables -A OUTPUT -p tcp --dport 80 -j ACCEPT
iptables -A OUTPUT -p tcp --dport 443 -j ACCEPT

iptables -A OUTPUT -d 192.168.1.254 -p udp --dport 53 -j ACCEPT
iptables -A OUTPUT -d 192.168.1.254 -p tcp --dport 53 -j ACCEPT


###########
# FORWARD #
###########

# WEB
iptables -A FORWARD -p icmp -j ACCEPT

iptables -A FORWARD -p tcp --dport 80 -j ACCEPT
iptables -A FORWARD -p tcp --dport 443 -j ACCEPT

iptables -A FORWARD -d 192.168.1.254 -p udp --dport 53 -j ACCEPT

# NAT Forwarding
iptables -t nat -A POSTROUTING -o enp6s2 -j MASQUERADE
iptables -A FORWARD -i enp6s2 -o enp6s0 -j ACCEPT -m state --state RELATED,ESTABLISHED
iptables -A FORWARD -i enp6s0 -o enp6s2 -j ACCEPT

iptables -A FORWARD -i enp6s2 -o enp6s1 -j ACCEPT -m state --state RELATED,ESTABLISHED
iptables -A FORWARD -i enp6s1 -o enp6s2 -j ACCEPT

iptables -A FORWARD -i enp6s2 -o enp0s25 -j ACCEPT -m state --state RELATED,ESTABLISHED
iptables -A FORWARD -i enp0s25 -o enp6s2 -j ACCEPT

iptables -A FORWARD -i enp6s2 -o wlp3s0 -j ACCEPT -m state --state RELATED,ESTABLISHED
iptables -A FORWARD -i wlp3s0 -o enp6s2 -j ACCEPT

#########
# BLOCK #
#########

iptables -A INPUT -j DROP
iptables -A OUTPUT -j DROP
iptables -A FORWARD -j DROP
Figure 6 : iptables_start.sh
To ensure that these rules are loaded at boot the script below needs to be run. This copies the current rules to the file /etc/network/rules.v4 that are then loaded when network interface enp6s2 is connected.
#!/bin/sh

./iptables_start.sh
iptables-save > rules.v4
cp rules.v4 /etc/network
Figure 7 : iptables_update.sh
Machines connecting to interfaces enp6s1, enp6s0, enp0s25 and wlp3s0 need to be assigned an IP address, this is achieved using the Dynamic Host Configuration Protocol (DHCP). To install a dhcp server on this machine:
sudo apt-get install isc-dhcp-server
To enable dhcp on specific network interface you need to edit /etc/default/isc-dhcp-server, adding the name of each interface (separated by a space) to the INTERFACES declarations:
INTERFACES = "enp6s1 enp6s0 enp0s25 wlp3s0"
The assigned IP address range for each interface is defined in the file /etc/dhcp/dhcpd.conf, a simple config file is shown below. For the wired connections devices connected are assigned a IP address within the specified range. For the wifi interface each IP address is assigned to a specific MAC address. In the example below a Raspberry Pi is included for syntax the other 14 MAC address declarations have been removed. From a security point of view this does improve things a little i.e. only specific machines can connect, but a MAC address can be easily spoofed, the main reason for including this is to help control / prevent other devices connecting to this interface accidentally.
# The ddns-updates-style parameter controls whether or not the server will
# attempt to do a DNS update when a lease is confirmed. We default to the
# behavior of the version 2 packages ('none', since DHCP v2 didn't
# have support for DDNS.)
ddns-update-style none;

# option definitions common to all supported networks...
#option domain-name "example.org";
#option domain-name-servers ns1.example.org, ns2.example.org;

default-lease-time 600;
max-lease-time 7200;

# If this DHCP server is the official DHCP server for the local
# network, the authoritative directive should be uncommented.
#authoritative;

# Use this to send dhcp log messages to a different log file (you also
# have to hack syslog.conf to complete the redirection).
log-facility local7;

# This is a very basic subnet declaration.

subnet 192.168.10.0 netmask 255.255.255.0{
	interface "enp6s1";
	option routers 192.168.10.254;
	option broadcast-address 192.168.10.255;

	option domain-name-servers 192.168.1.254;

	option subnet-mask 255.255.255.0;
	option time-offset 0;
	range 192.168.10.1 192.168.10.2;
}

subnet 192.168.20.0 netmask 255.255.255.0{
	interface "enp6s0";
	option routers 192.168.20.254;
	option broadcast-address 192.168.20.255;

	option domain-name-servers 192.168.1.254;

	option subnet-mask 255.255.255.0;
	option time-offset 0;
	range 192.168.20.1 192.168.20.2;
}

subnet 192.168.30.0 netmask 255.255.255.0{
	interface "enp0s25";
	option routers 192.168.30.254;
	option broadcast-address 192.168.30.255;

	option domain-name-servers 192.168.1.254;

	option subnet-mask 255.255.255.0;
	option time-offset 0;
	range 192.168.30.1 192.168.30.2;
}

subnet 192.168.50.0 netmask 255.255.255.0{
	interface "wlp3s0";
	option routers 192.168.50.254;
	option broadcast-address 192.168.50.255;
	option domain-name-servers 192.168.1.254;

	option subnet-mask 255.255.255.0;
	option time-offset 0;
	range 192.168.50.1 192.168.50.15;

	host pi-1{
		hardware ethernet B8:27:EB:D4:B2:E9;
		fixed-address 192.168.50.15;
	}
}
Figure 8 : dhcpd.conf
To configure the wifi interface as an access point (AP) you need to install a host access point daemon (hostapd):
sudo apt-get install hostapd
This software is configured using the file /etc/hostapd/hostapd.conf an example is shown below:
#sets the wifi interface to use, is wlan0 in most cases
interface=wlp3s0

#driver to use, nl80211 works in most cases
driver=nl80211

#sets the ssid of the virtual wifi access point
ssid=wifi

#sets the mode of wifi, a,b,g,n. Setting to g ensures backward compatiblity.
hw_mode=g

#sets the channel for your wifi
channel=6

#macaddr_acl sets options for mac address filtering. 0 means “accept unless in deny list”
macaddr_acl=0

#setting ignore_broadcast_ssid to 1 will disable the broadcasting of ssid
ignore_broadcast_ssid=0

#Sets authentication algorithm
#1 = only open system authentication
#2 = both open system authentication and shared key authentication
auth_algs=1

#####Sets WPA and WPA2 authentication#####
#wpa option sets which wpa implementation to use
#1 = wpa only
#2 = wpa2 only
#3 = both
wpa=2

#sets wpa passphrase required by the clients to authenticate themselves on the network
wpa_passphrase=passwordisthepassword

#sets wpa key management
wpa_key_mgmt=WPA-PSK

#sets encryption used by WPA
wpa_pairwise=TKIP

#sets encryption used by WPA2
rsn_pairwise=CCMP
Figure 9 : hostapd.conf
To start the hostapd daemon there are a number of different approaches, do confess went for the simple solution, a crontab entry, perhaps not the best solution, but it works. At the command line typed sudo crontab -e, if this is the first time you have updated this you will be asked to select an editor, i also go for vi, a standard piece of software across a range of machines. The reason i went for this solution was that sometimes the hostapd daemon didn't seem to start correctly, therefore, by running the script below every 10 minutes the system can check and restart the daemon if there is a problem. Also in the crontab is the shutdown command to turn the machine off at 11:00pm, no one uses wifi after 11:00 :).
#!/bin/sh

RESULT=$(ps -ef | grep "hostapd" | grep -v "grep" | wc -l)
TIME_STAMP=$(date)

if test $RESULT -lt 2
then
	echo "$TIME_STAMP : hostapd not running"
	/usr/sbin/hostapd /etc/hostapd/hostapd.conf &

else
	echo "$TIME_STAMP : hostapd running"
fi
Figure 10 : wificheck.sh
@reboot /usr/sbin/hostapd /etc/hostapd/hostapd.conf

*/10 * * * * /home/mike/bin/wificheck.sh &>/home/mike/bin/wifi.log
0 23 * * * /sbin/shutdown -h now
Figure 11 : crontab entries
The final system is shown in figure 12, note, the modern ps2 mouse and keyboard, a proper mouse, with a ball :). The wifi card has two antenna connections, one uses a standard off the shelf high gain antenna, connected directly to the back of the PC. The other uses an extension lead to a smaller antenna, however, this one has a reflector, making it a little more directional.
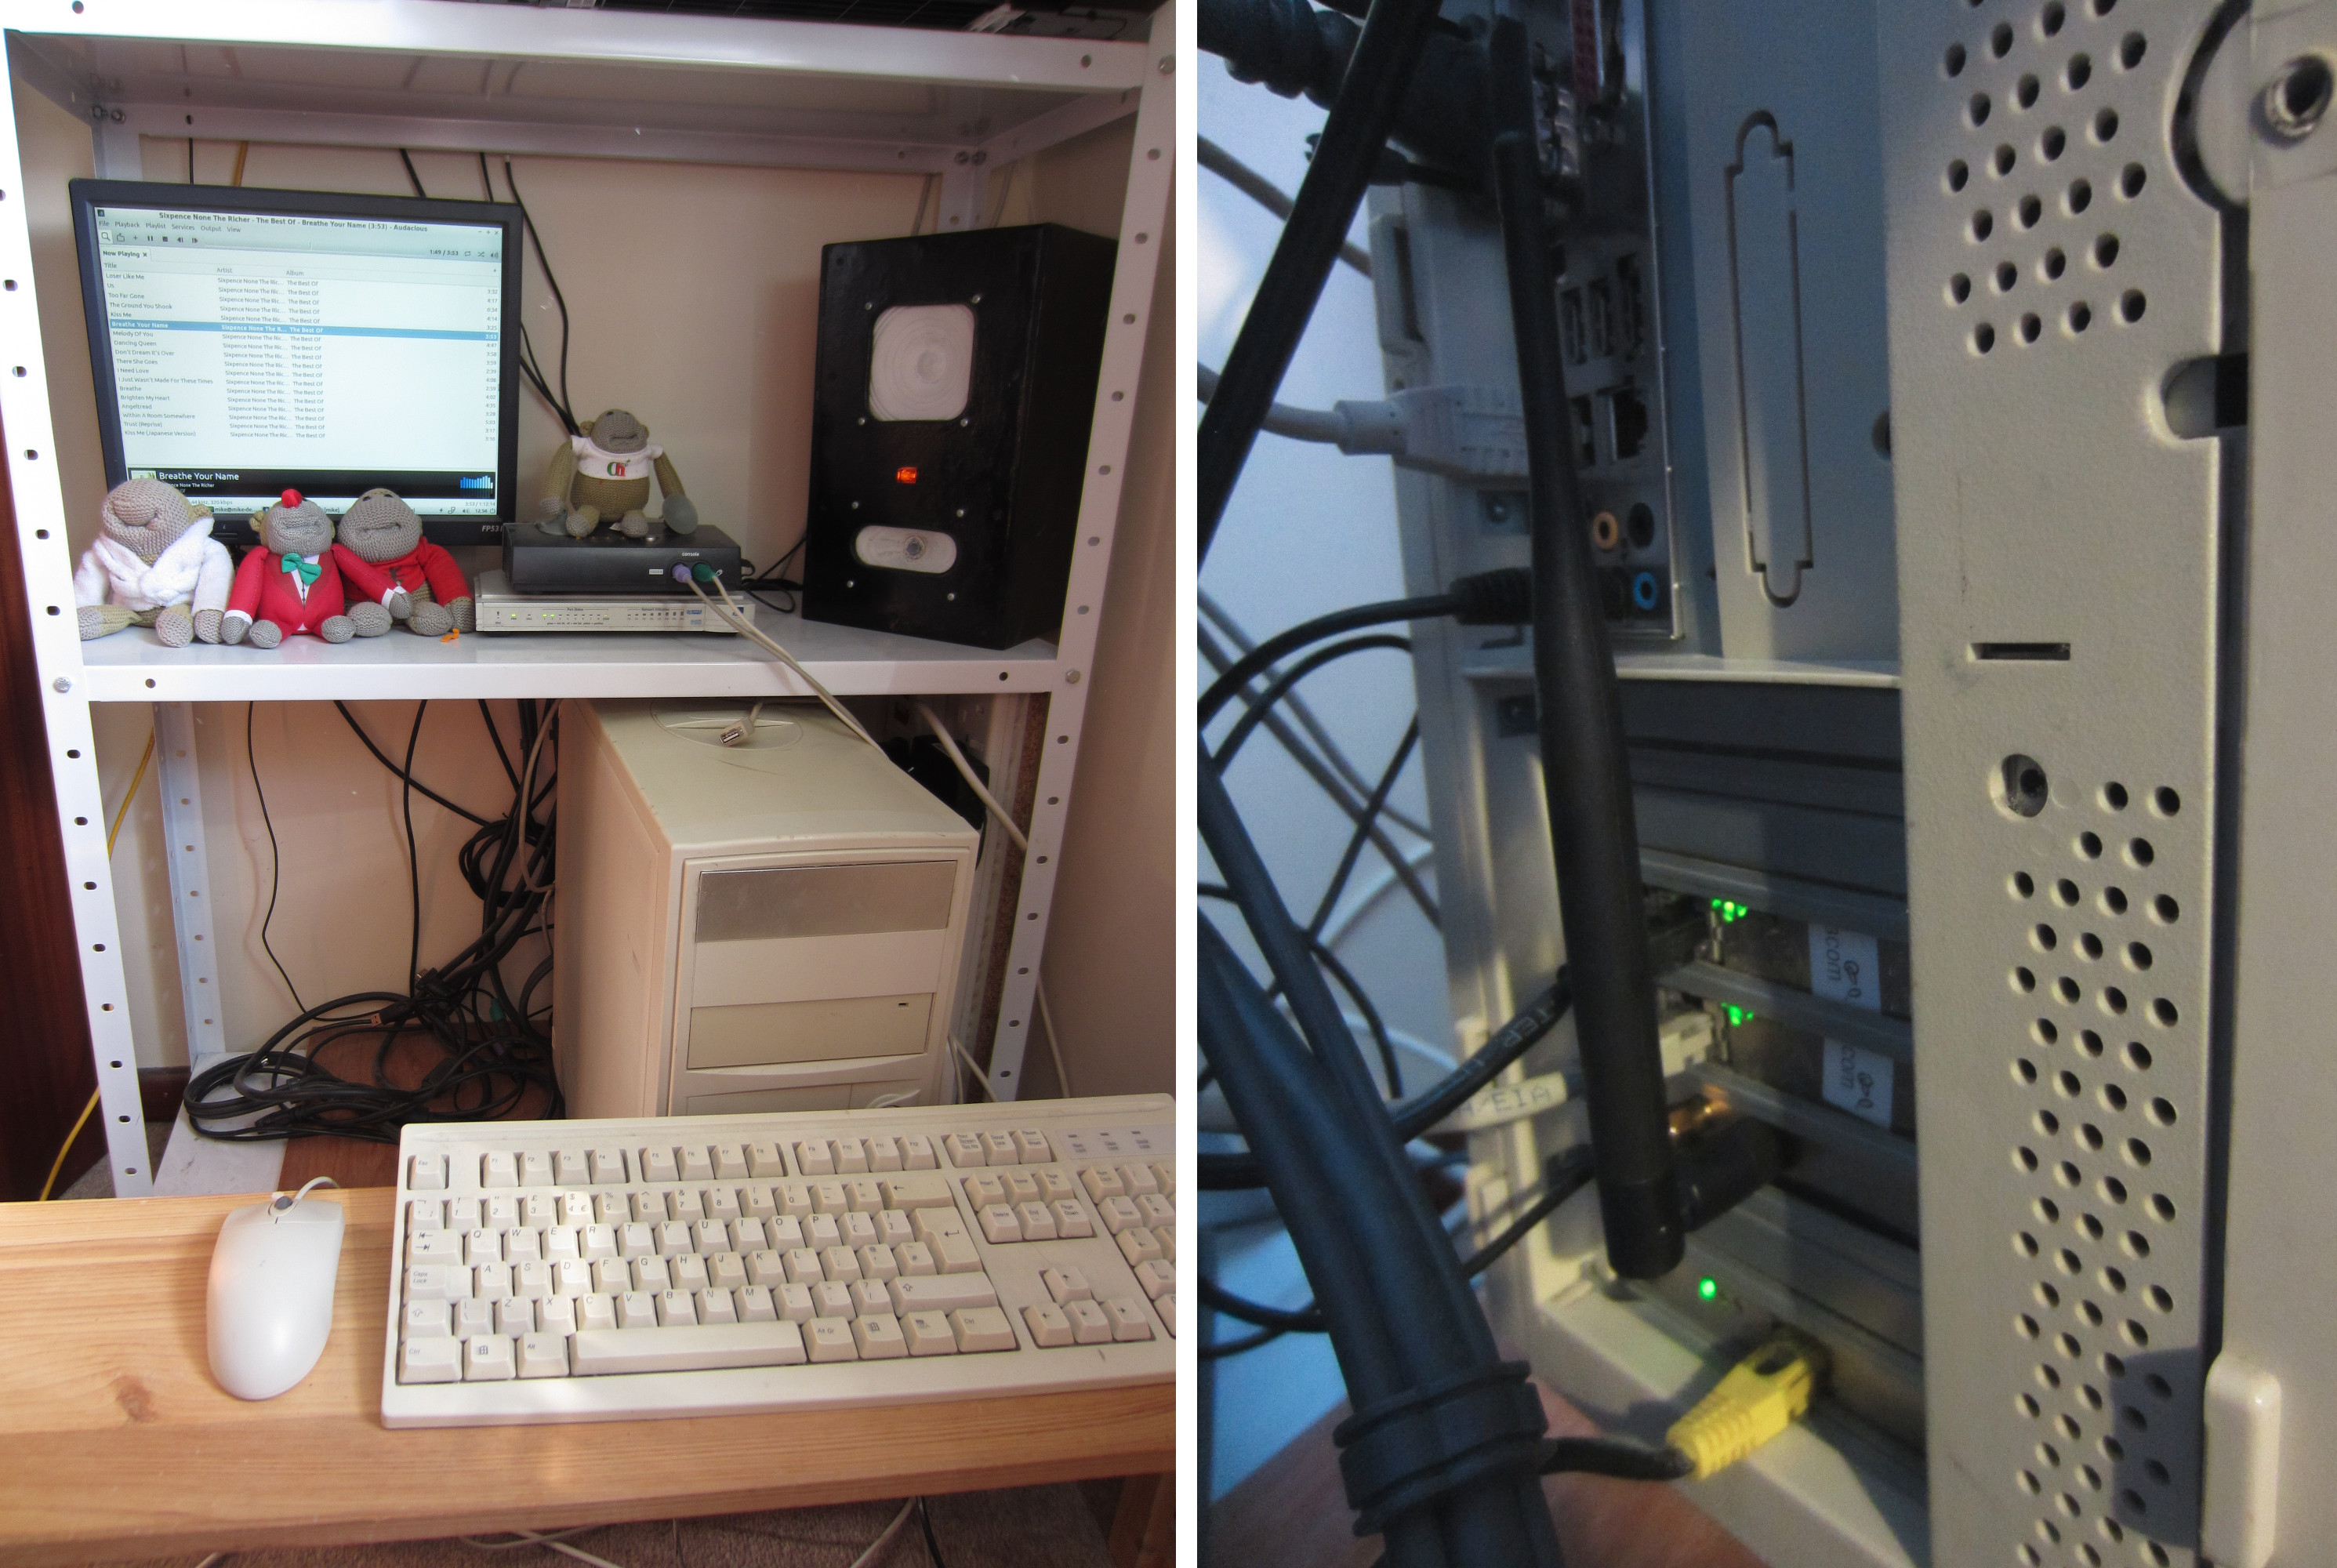
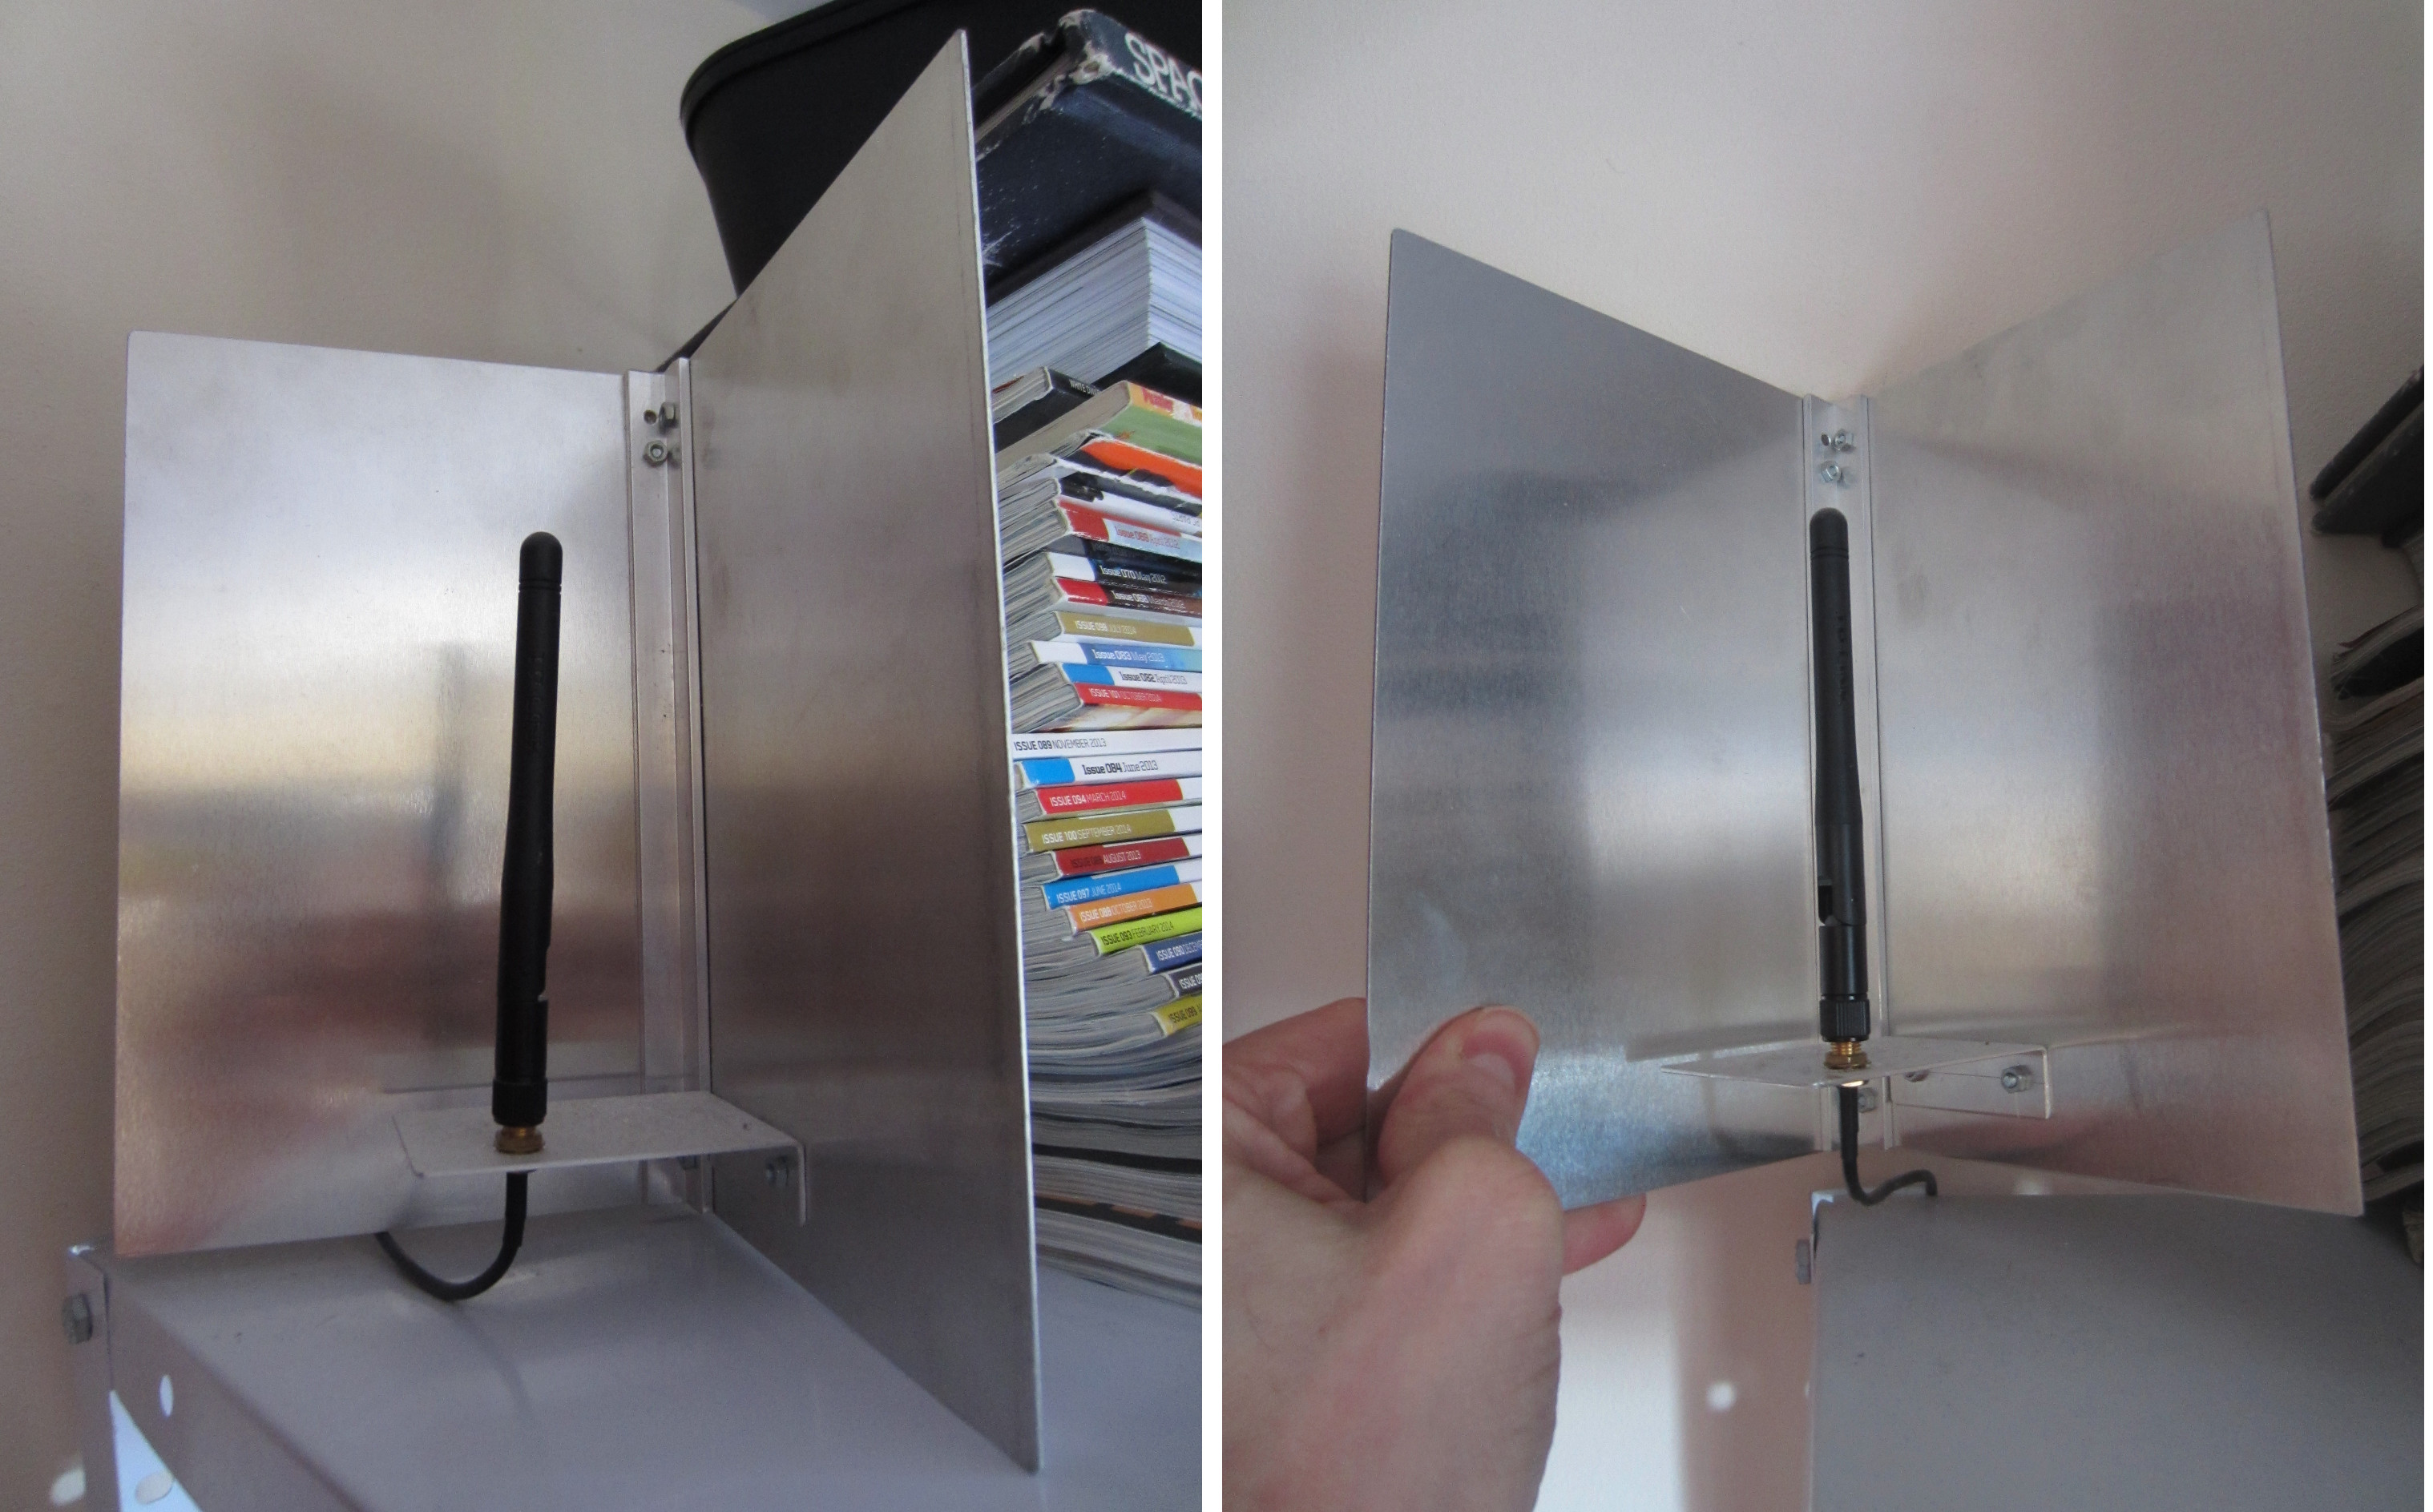
Figure 12 : Finished system
The system works well, no problems so far, processor load looks quite minimal, so also use this machine to play music, since its already on, did try and use it to stream video, but the processor was definitely not up to that. To check the network cards are working iftop is a useful command line tool, allows you to see active connections and a record of the RX/TX traffic. This simple command line tool does have a few option which can help trace down what activity is happening on the processor:
sudo iftop -i enp6s0
With all these network interfaces you need a means to plot graphs of network activity, lots of different tools on the markets, but a simple to install one is cacti, this allows you to monitor a number of different parameters and display them as time graphs, hour, day, month ... To install:
sudo apt-get install cacti
Follow the install prompts, to keep things simple when requested i used the same password for all elements, need to change that later. Also need to go back and optimise the MySQL stuff. I confess i found cacti a little confusing to setup. After a little reading you need to have a snmpd running. Simple Network Management Protocol (snmp) allows you to obtain the statistics you need. This comes in three flavours: SNMPv1, SNMPv2 and SNMPv3. For more information refer to: LINK. I used SNMPv1 this has no security, but is easier to test. As i'm the only person that has access to this machine and ive limited queries to 127.0.0.1, i think this hole is "OK" for the moment. The configuration file for snmpd is below:
sudo apt-get install snmpd


agentAddress	udp:127.0.0.1:161
rocommunity	public localhost

sysLocation	LocalMachine
sysContact	Me

disk	/	10000
load	12 10 5
Figure 13 : /etc/snmp/snmpd.conf
Note, need to enable this interface:port in the iptables script, also explicitly blocked access in the INPUT/FORWARD/OUTPUT tables on other interfaces. This should be all that is needed for cacti, but not an expert, do need to go back and have a closer look at this, just playing around at present. To launch cacti, start a browser and go to: http://127.0.0.1/install. This will take you through the install process, login using username:admin, password:admin, you will then be forced to enter a new password. You can then access the cacti web interface via: http://127.0.0.1/cacti. Didn't find the cacti interface that easy to use, key point is that your options are either displayed on the left hand side panel, within the webpage or on the top right blue bar e.g. ADD. Knowing where the next place to click is a little confusing, especially if your using an old 14 inch monitor and the full webpage does not fit onto the screen :(. First you need to create a device, as shown below:
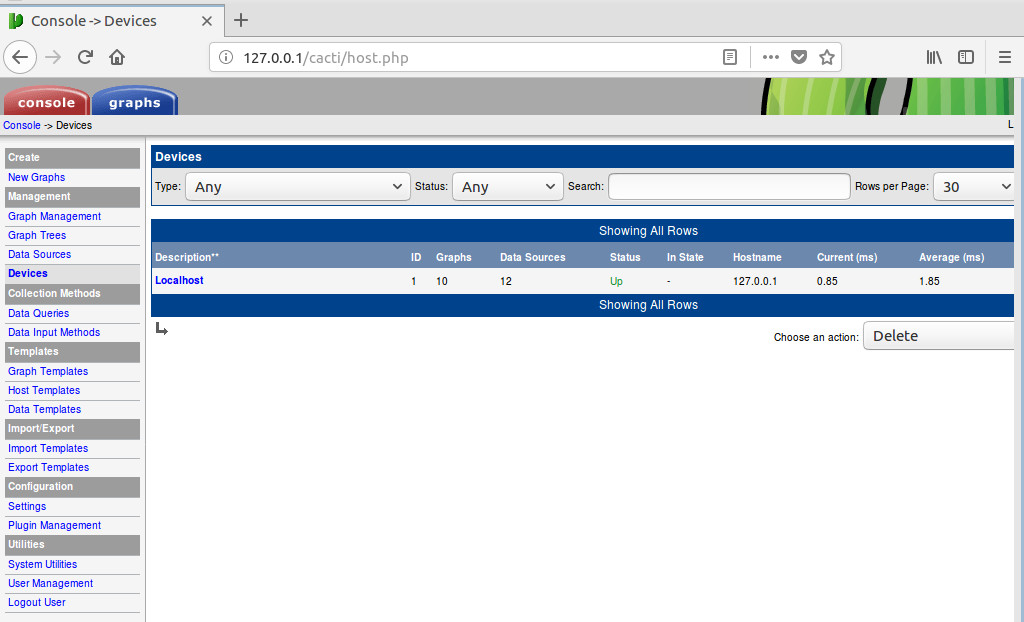
Figure 14: device
Double click on the name, in this case "Localhost" to configure, as shown below. The key points to note, within the "Associated Data Queries" add "SNMP - interface statistics", then after pressing the save button check the top text box under "Localhost (127.0.0.1), if cacti can not talk to the snmpd daemon then you will get an error message here, so you need to debug the snmpd side of things. If the "Availability/Reachability" options fail then cacti will not log data from that device. To check that snmpd is running at the command line type: snmpwalk 127.0.0.1 -c public -v1 this should give you a lot of "details". Another check is to change the "Availability/Reachability" options to ICMP ping, this is enabled in iptables so the basic cacti graph templates should work.
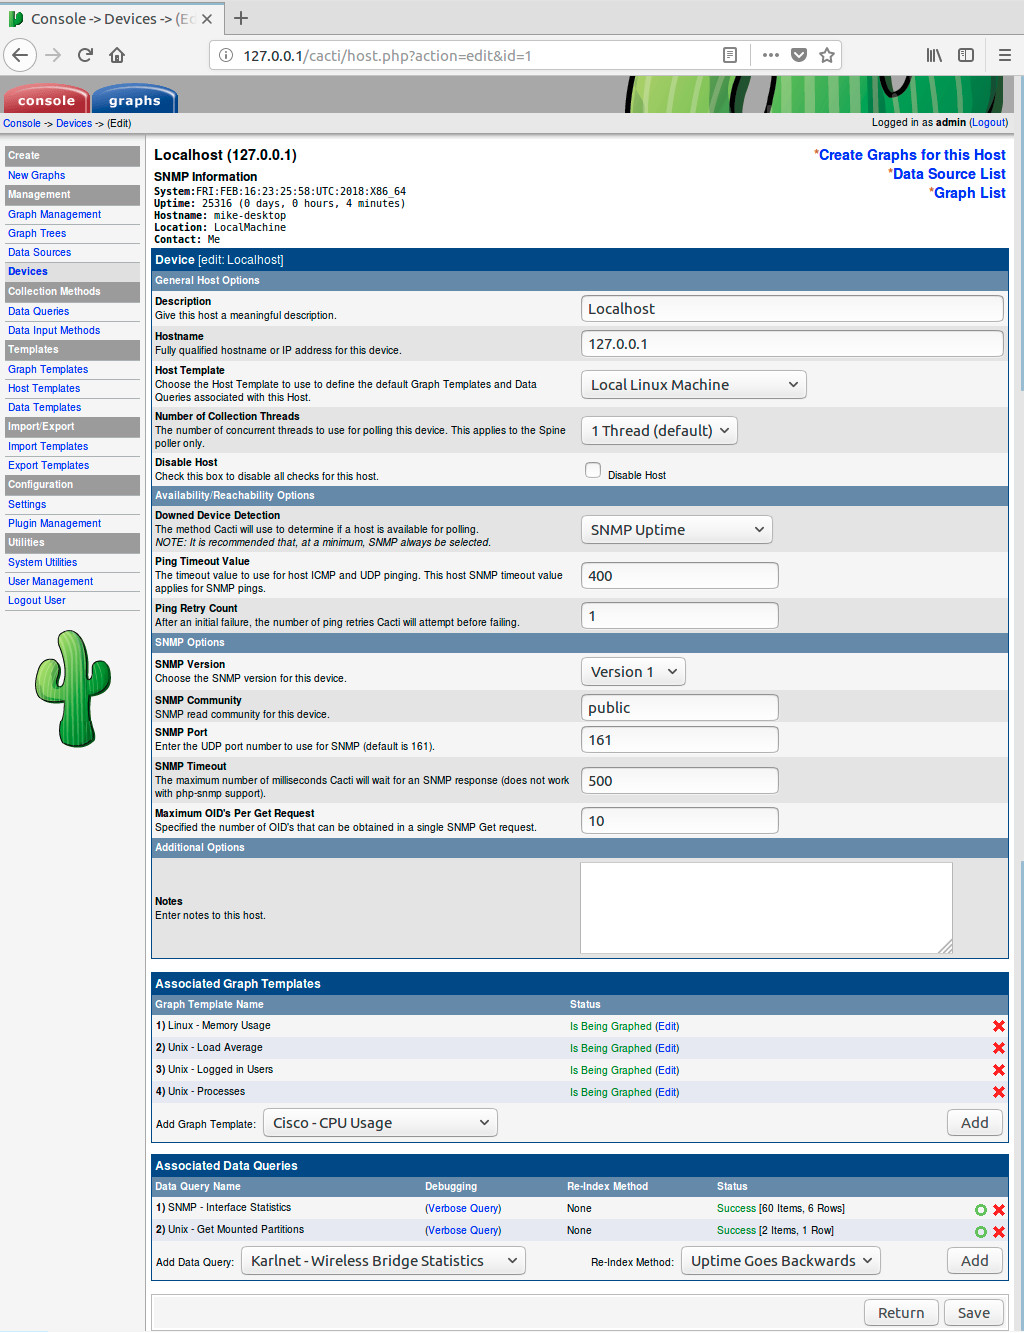
Figure 15: device configuration
If all is good you can now start to add the graphs that you would like to plot. From the left hand side panel click on "New Graphs", then from the graph types pull down select "SNMP - interface statistics". You can then search using the network adaptor names and create the desired graph. I found that the bit/byte counter graphs did not seem to plot at first, but the total bandwidth were fine. Note, don't forget to select/tick the devices tick box before you press the Create button, if you don't you will not create a graph. Cacti comes with some built in templates / graph types, allowing you to plot disk usage and processor load etc. I think you can add more detail / options by editing the snmpd.conf, but i have not looked into that.
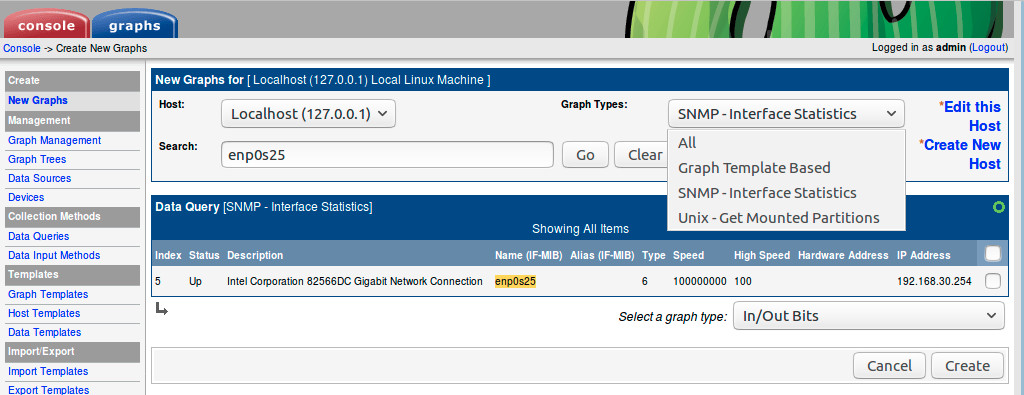
Figure 16: create graphs
When complete you can view or edit these data sources. From the left hand side panel click on "Data sources", then double click on an entry, this is useful to change the desired statistic e.g. log bits or bytes etc. To remove a data source select the item using the right hand side tick box, then select "Delete" from the option box and click Go.

Figure 17: edit graphs
Not sure if this step is required, may be for larger systems, but you can group / organise graphs together. From the left hand side panel click on "Graph Management", then select graph tick boxes and select "Place on a tree (local)", then click Go.
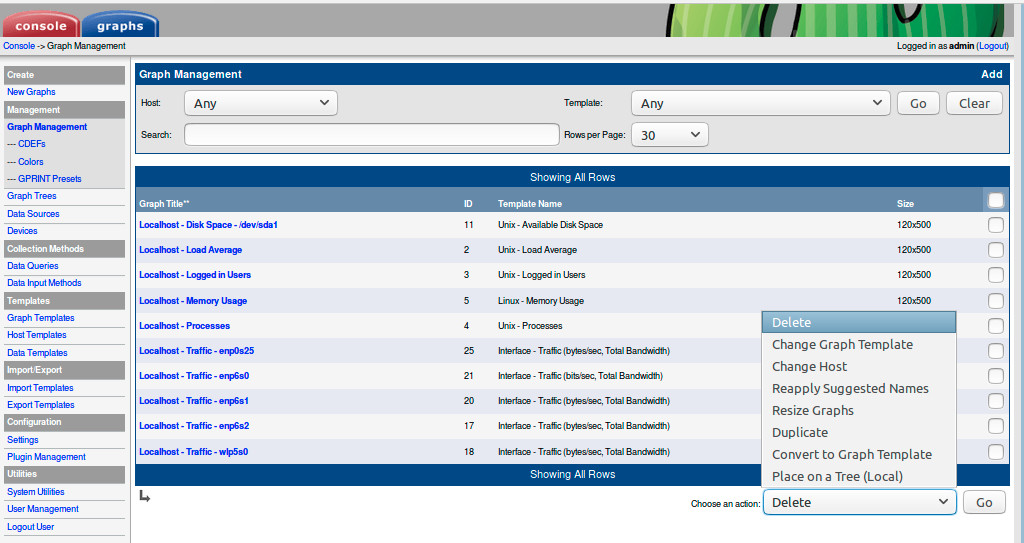
Figure 18: group graphs
Wait 10 minutes and you should start to be data being logged, as shown below
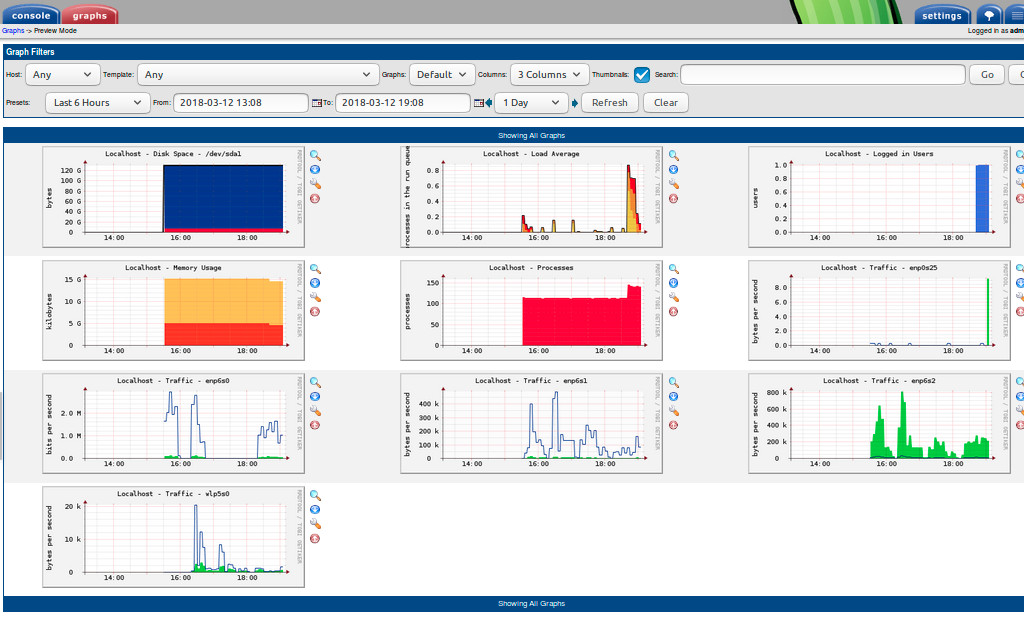
Figure 19: graphs
Then next thing to was load "balancing". At its simplest i can turn on/off each network interface at the command line i.e. as each computer is on a different subnet/interface you can simply disconnect it from the network using:
sudo ifdown enp6s0
sudo ifup enp6s0
What i was really looking for was something a little more controllable. The aim is to stop one person saturating the network, stopping other people from using the network. Before you can limit bandwidth, the first question to answer is "what is the max" bandwidth. Using the "Which" broadband speed test my home network speed is 11.5Mbps download and 1.6Mbps upload, so pretty standard base model. To share this limited resoure there are few solutions, the simplest seems to be wondershaper, but there was a little discussion regarding its age / support, not sure if that is significant. To install:
sudo apt-get install wondershaper
To use is very simple you just specify the maximum download speed (first parameter) and upload speed (second parameter) for each interface (in Kbps). Therefore, knowing that the max speeds are 11500Kbs and 1600kbps, need to set some reasonable max limits for each interface. Again to wrote a script (below) and again ran this at boot using a cron job
#!/bin/sh

wondershaper enp0s25 10000 1000
wondershaper enp6s0  8000  1000
wondershaper enp6s1  8000  1000
wondershaper wlp3s0  8000  1000
This all seems to work, but, its not very clever e.g. if only one person is connected to the network they are capped, when really they should have the full network bandwidth available to them. But, this does stop the someone blocking the network i.e. if one of the interface does max out, there is still 4Mbps free for the other users. Will need to think of a better solution. Initial thoughts is that i can wrote a script, every 10 minutes it pings network connections, determines what is connected and selects the appropriate limits i.e. if only one device is connected there are no limits.

This work is licensed under a Creative Commons Attribution-NonCommercial-NoDerivatives 4.0 International License.
Contact details: email - mike.freeman@york.ac.uk, telephone - 01904 32(5473)
Back